Multi-tenancy
Learn how to set up multi-tenancy with Optimize.
Possible multi-tenancy scenarios
As described in the Camunda 7 documentation, there are two possible multi-tenant scenarios which are also supported by Optimize:
Single process engine with tenant-identifiers
Tenant-identifiers available in the Camunda 7 engine are automatically imported into Optimize and tenant-based access authorization is enforced based on the configured Tenant Authorizations within the Camunda 7. This means there is no additional setup required for Optimize in order to support this multi-tenancy scenario.
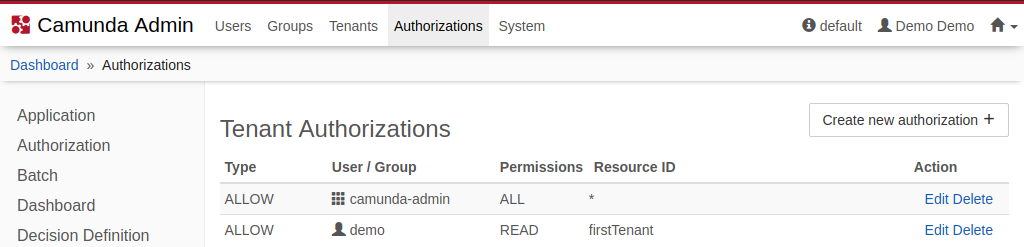
Users granted tenant access via the Camunda 7 will be able to create and see reports for that particular tenant in Optimize. In the following screenshot, the user demo is granted access to data of the tenant with the id firstTenant and will be able to select that tenant in the report builder. Other users, without the particular firstTenant authorization, will not be able to select that tenant in the report builder nor be able to see results of reports that are based on that tenant.
One process engine per tenant
In the case of a multi-engine scenario where tenant-specific data is isolated by deploying to dedicated engines, there are no tenant identifiers present in the particular engines themselves. For a single Optimize instance that is configured to import from each of those engines to support this scenario, it is required to configure a defaultTenant for each of those engines.
The effect of configuring a defaultTenant per engine is that all data records imported from the particular engine where no engine-side tenant identifier is present this defaultTenant will be added automatically. Optimize users will be authorized to those default tenants based on whether they are authorized to access the particular engine the data originates from. So in this scenario, it is not necessary to configure any Tenant Authorizations in the Camunda 7 itself.
The following environment-config.yaml configuration snippet illustrates the configuration of this defaultTenant on two different engines.
...
engines:
  "engineTenant1":
    name: engineTenant1
    defaultTenant:
      # the id used for this default tenant on persisted entities
      id: tenant1
      # the name used for this tenant when displayed in the UI
      name: First Tenant
  ...
  "engineTenant2":
    name: engineTenant2
    defaultTenant:
      # the id used for this default tenant on persisted entities
      id: tenant2
      # the name used for this tenant when displayed in the UI
      name: Second Tenant
...
Optimize users who have a Optimize Application Authorization on both engines will be able to distinguish between data of both engines by selecting the corresponding tenant in the report builder.
Once a defaultTenant.id is configured and data imported, you cannot change it any more without doing a full reimport as any changes to the configuration cannot be applied to already imported data records.