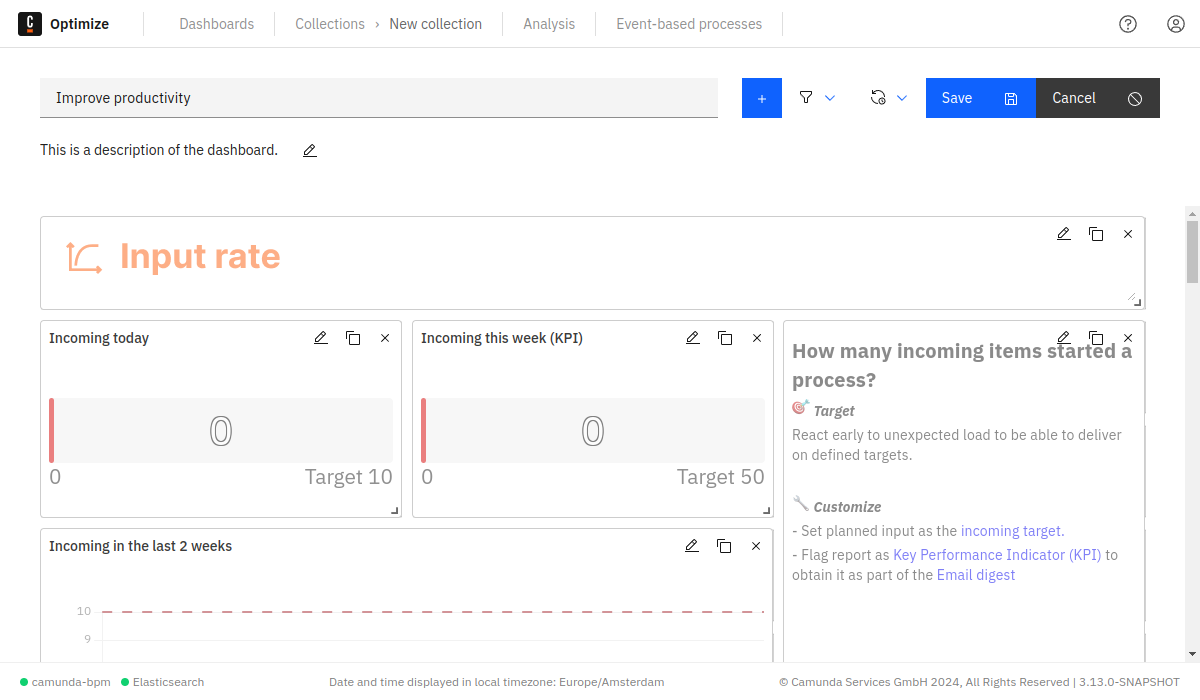
Edit mode
Configure and customize your dashboard in edit mode, performing operations such as renaming, modifying or removing descriptions, adding, editing, copying or removing tiles, saving changes, canceling applied changes, setting dashboard filters, and defining a default auto-refresh rate for periodic updates in view mode.
Adding tiles
Assemble reports into a dashboard by clicking "Add a Tile" above the dashboard grid. In the modal, select Optimize reports or external website and text tiles, combining data from various sources as external website tiles and text tiles.
Optimize reports
In the Add a Tile modal, use the Optimize Report tab to add reports to the dashboard. Use the Select a Report field to select one of the previously created reports or click + New Report from a template to create a new report.

If the dashboard is inside a collection, only reports that are in the same collection can be added. If the dashboard is not in a collection, it can only contain reports that are also not in a collection.
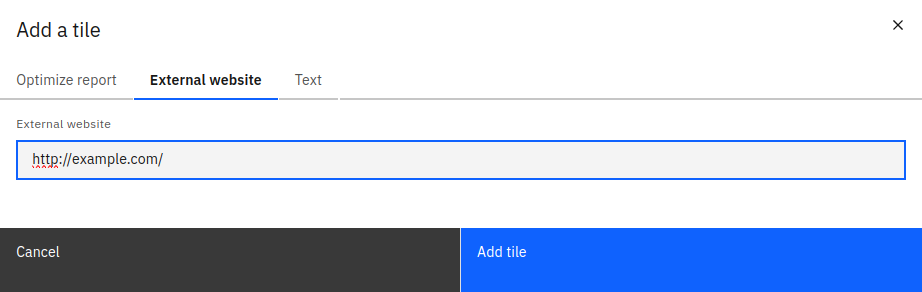
External websites
In the Add a Tile modal, select External Website to input the URL of an external data source to be included in the dashboard. External websites are incorporated as iframes within the dashboard.
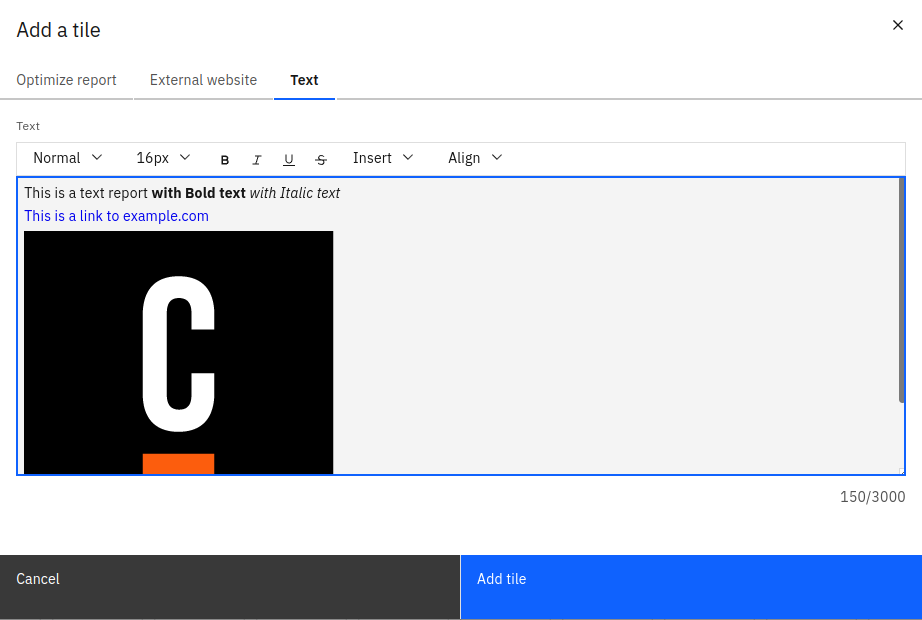
Text tiles
In the Add a Tile modal, choose Text to access the text editor. This enables the creation of documents with formatted text, links, and images.
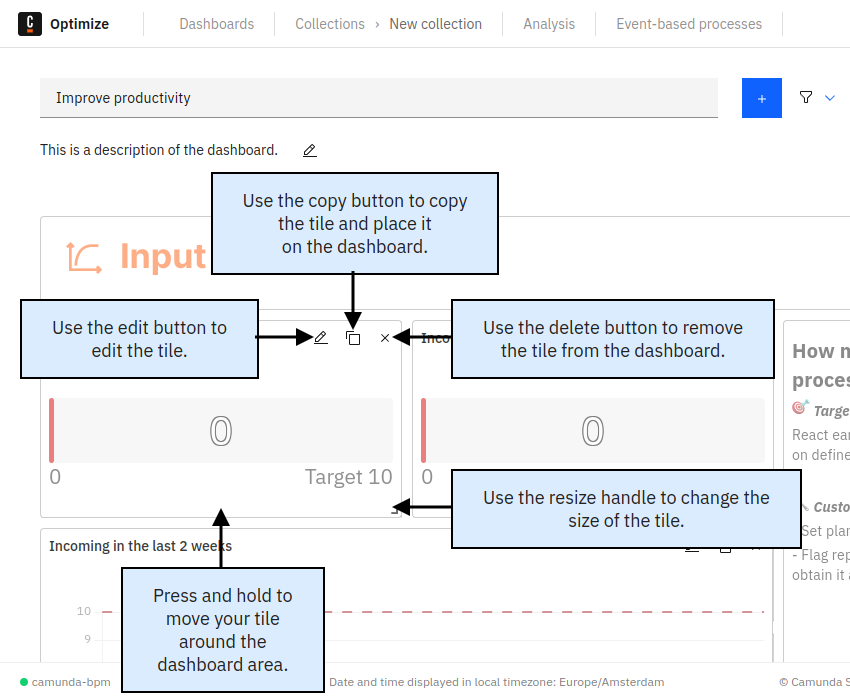
Editing, copying, and removing tiles
Each tile features a set of buttons in its top-right corner, providing you with options to edit  and remove
  the tile. The copy button
  allows you to duplicate any tile, and the copied version can be conveniently placed anywhere on the dashboard. This duplicated tile is then customizable, enabling you to tailor it to your specific requirements.
Placing tile on the dashboard
Move tiles within the dashboard by dragging them to your preferred location. Upon releasing the tile, it aligns with the nearest grid position. Resize tiles by dragging the handle in the lower right corner. Remove a tile by clicking the button in the top right corner.
Adding filters in edit mode
In dashboard edit mode, click Add a Filter to reveal the Filters panel. Specify filters for the dashboard, including start and end dates, process instance states (running, completed, or canceled), variable values, assignees, and candidate groups:
- Start date: Allows filtering by process instance start date
- End date: Allows filtering by process instance end date
- Instance state: Allows filtering by process instance state, such as running, completed, or canceled
- Variable: Allows filtering by process instance variable value
- Assignee: Allows filtering flow node data by their assignee
- Candidate Group: Allows filtering flow node data by their candidate group
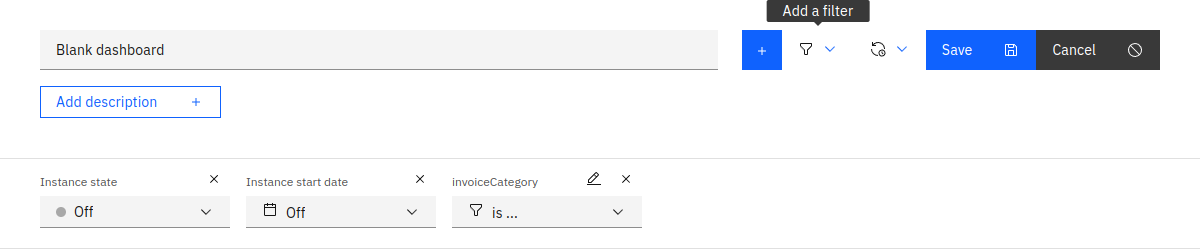
For Variable Filters, define the variable and provide a list of values for filtering. Optionally, allow viewers to add their own filter values by checking the Allow viewer to add filter values box. Unlike report filters, adding a value here doesn't immediately apply; it only makes the value available for dashboard filtering.
For Assignee and Candidate Group filters, specify available options. Similarly, allow viewers to add their values.
The list of variable names, values, assignees, and candidate groups is compiled from all reports on the dashboard.
Setting a default dashboard filter
After specifying filters in edit mode, dashboard editors can set a default filter, applied when a user first opens the dashboard. Viewers can remove filter values to see unfiltered reports, but if no manual changes are made, they will view reports with the defined default filter.
To set a default filter, use the added filter options in the filter area. The configuration set during dashboard save becomes the default filter.
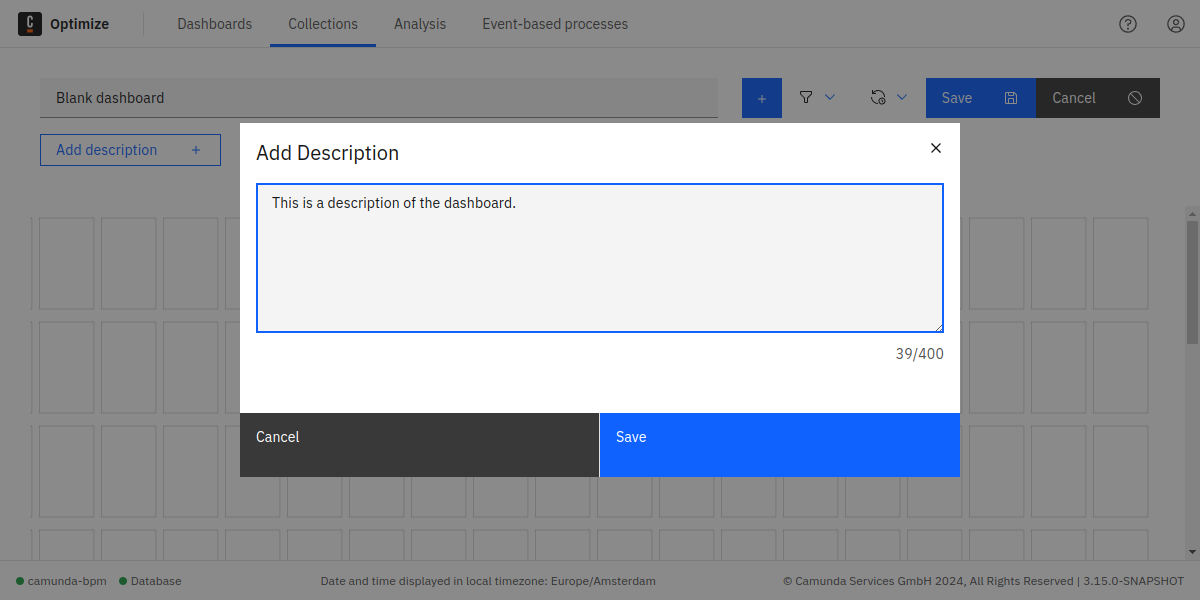
Adding or editing description
Under the Dashboard name, view or modify the description using the Add/Edit button. The text editor allows the addition of plain text descriptions, limited to 400 characters.