Run your first local Camunda 8 project
This guide is tailored for developers who want to implement process automation solutions using Java and Spring. You'll work with a local, self-managed, lightweight Camunda 8 environment.
Get started with an example project
You will:
- Run Camunda 8 in a local development environment using Camunda 8 Run.
- Use the Camunda Modeler to deploy and start a business process.
- Run workers written in either:
- The Spring (Java) SDK, or
- The Node.js (JavaScript) SDK
to handle tasks in the process.
Prerequisites
Download the Camunda 8 starter package
Download the Camunda 8 starter package from the following website:
https://developers.camunda.com/install-camunda-8/
The starter package includes the following components:
- Camunda 8 Run – A simplified, single-application Camunda configuration for a local development environment.
- Camunda Modeler – An application for modeling BPMN, DMN, and Forms.
- Getting started project – An example project with a simple BPMN process and workers in Java or JavaScript.
All of these components are included in the starter package. You do not need to download them separately. The links above are provided for additional information.
Example project
The example project, located in the camunda-8-get-started directory, contains a BPMN process model that represents a simple e-commerce flow with three service tasks.
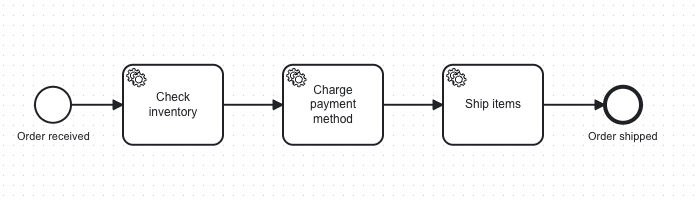
The service tasks in the process are executed by job workers. The java and nodejs directories contain code for job workers that correspond to this process model.
Instructions
Unzip the Camunda 8 starter package.
Start Camunda 8 Run by changing into the directory and running the command:
- Mac OS + Linux
- Windows
./1-camunda-starter.sh.\1-camunda-starter.batOpen the Camunda Modeler application from the starter package.
In Camunda Modeler, use:
to open the file:File > Open File...camunda-8-get-started/bpmn/diagram_1.bpmnClick the "Rocket" icon to connect to your Camunda 8 Run instance and deploy the model. Select
Camunda 8 Self-Managedand usehttp://localhost:26500as the cluster endpoint.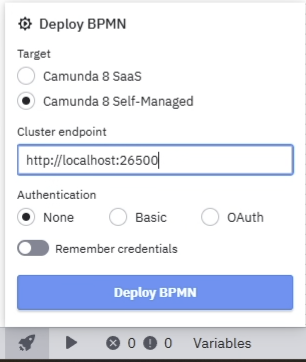
Click the “Play” icon on the bottom toolbar of Modeler to deploy and start an instance of the process model.
You do not need to set any variables for the process.
Optionally, you can set a value for the
itemvariable by pasting in:{"item": "special widget"}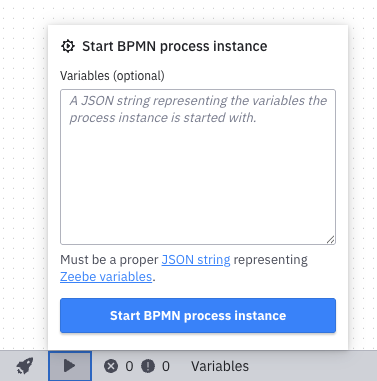
View the process instance and start job workers
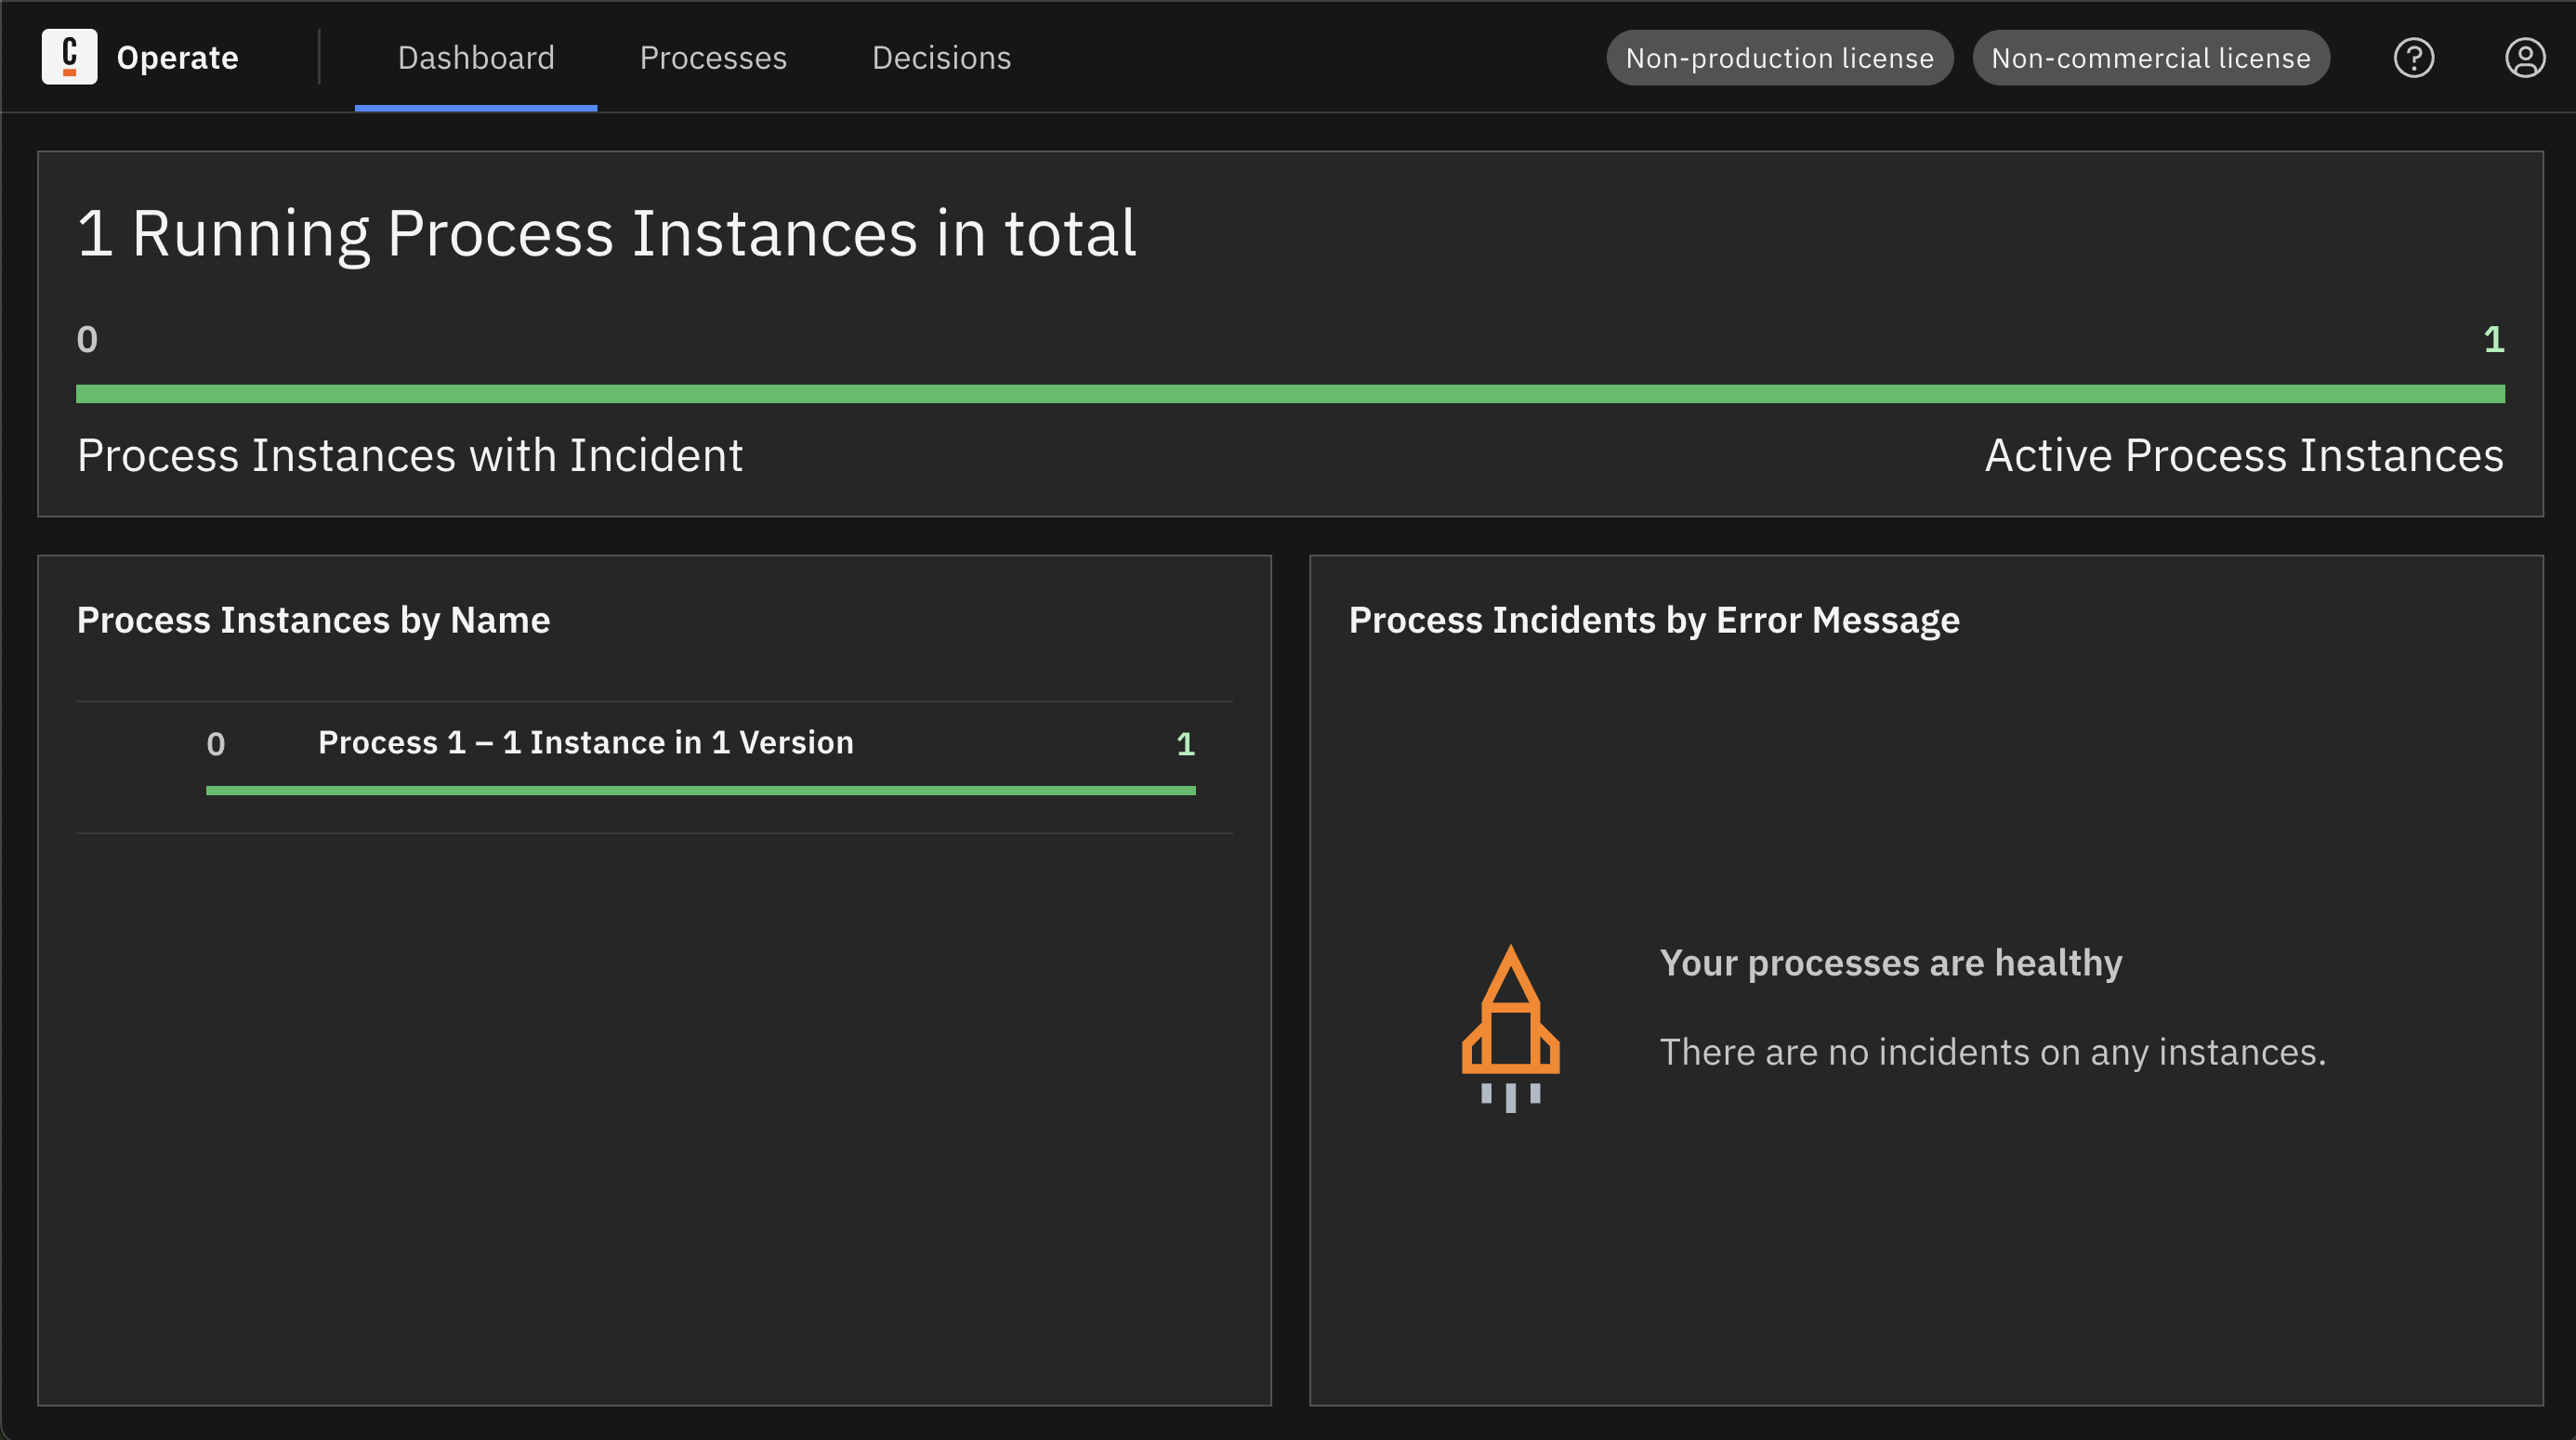
A process instance is now running in the engine.
You can view the process instance in Operate, the visual operations tool, by navigating to:
http://localhost:8080/operate
Login with the credentials: demo / demo.
There you will see an active process instance.
Data needs to sync to Operate, so the process instance may not be visible immediately.
Additionally, when the workers are running, process instances will be completed immediately and further process instances will not appear as active.
Next, start the job workers to allow them to perform the work for the service tasks. The workers are configured to connect to the locally-running engine and retrieve available work for the process instance.
- Java + Spring
- Node.js
Change into the Spring SDK directory:
cd camunda-8-get-started
cd java
Start the workers with the command:
mvn spring-boot:runYou can stop the application via Ctrl+C.
Change into the Node.js SDK directory:
cd camunda-8-get-started
cd nodejs
Install dependencies with the command:
npm iStart the workers with the command:
npm startYou can stop the application via Ctrl+C.
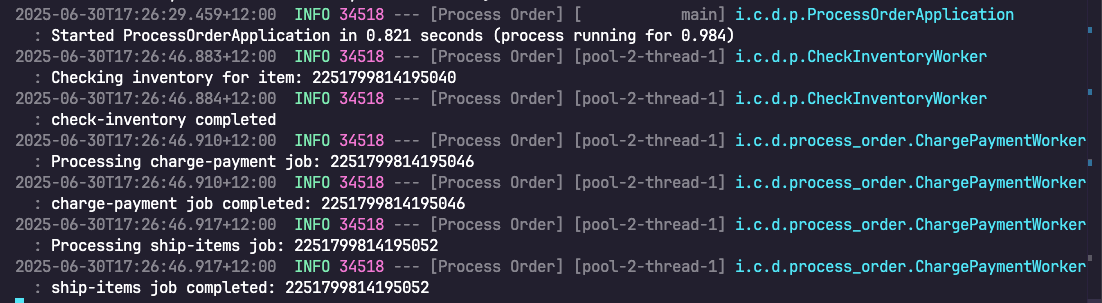
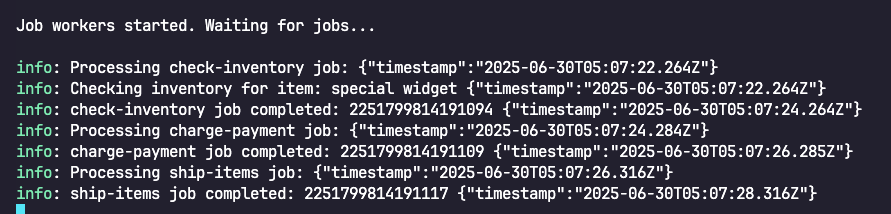
The workers start, connect to the engine, and request work. You will see the workers processing the jobs for the process instance.
- Java + Spring
- Node.js
Complete!
Navigate back to Operate and verify that your active process instance in Operate has transitioned to completed.
Summary
You have completed your first process instance by:
- Running Camunda 8 Run locally.
- Deploying a process model.
- Starting a process instance.
- Completing the service tasks in the process instance using job workers.
Next steps
For further information about the Node.js SDK, refer to the Camunda 8 JavaScript SDK API documentation.
Find more examples on the Developer Portal.
Teardown
You can stop Camunda 8 Run by executing:
- Mac OS + Linux
- Windows
cd c8run && ./c8run stop
cd c8run && .\c8run.exe stop