Extract unstructured data
Use this extraction method to extract data from unstructured documents.
Data extraction steps
Complete the following steps to configure and publish an unstructured data document extraction template:
- Upload documents: Upload a set of sample documents to use for training the extraction model.
- Extract fields: Add and configure the extraction fields you want to use to extract data.
- Validate extraction: Test and evaluate the data extraction results, and publish the document extraction template.
Step 1: Upload documents
Start by uploading a set of sample PDF documents that represent the specific document type you want to extract data from. You will use these documents throughout the data extraction process.
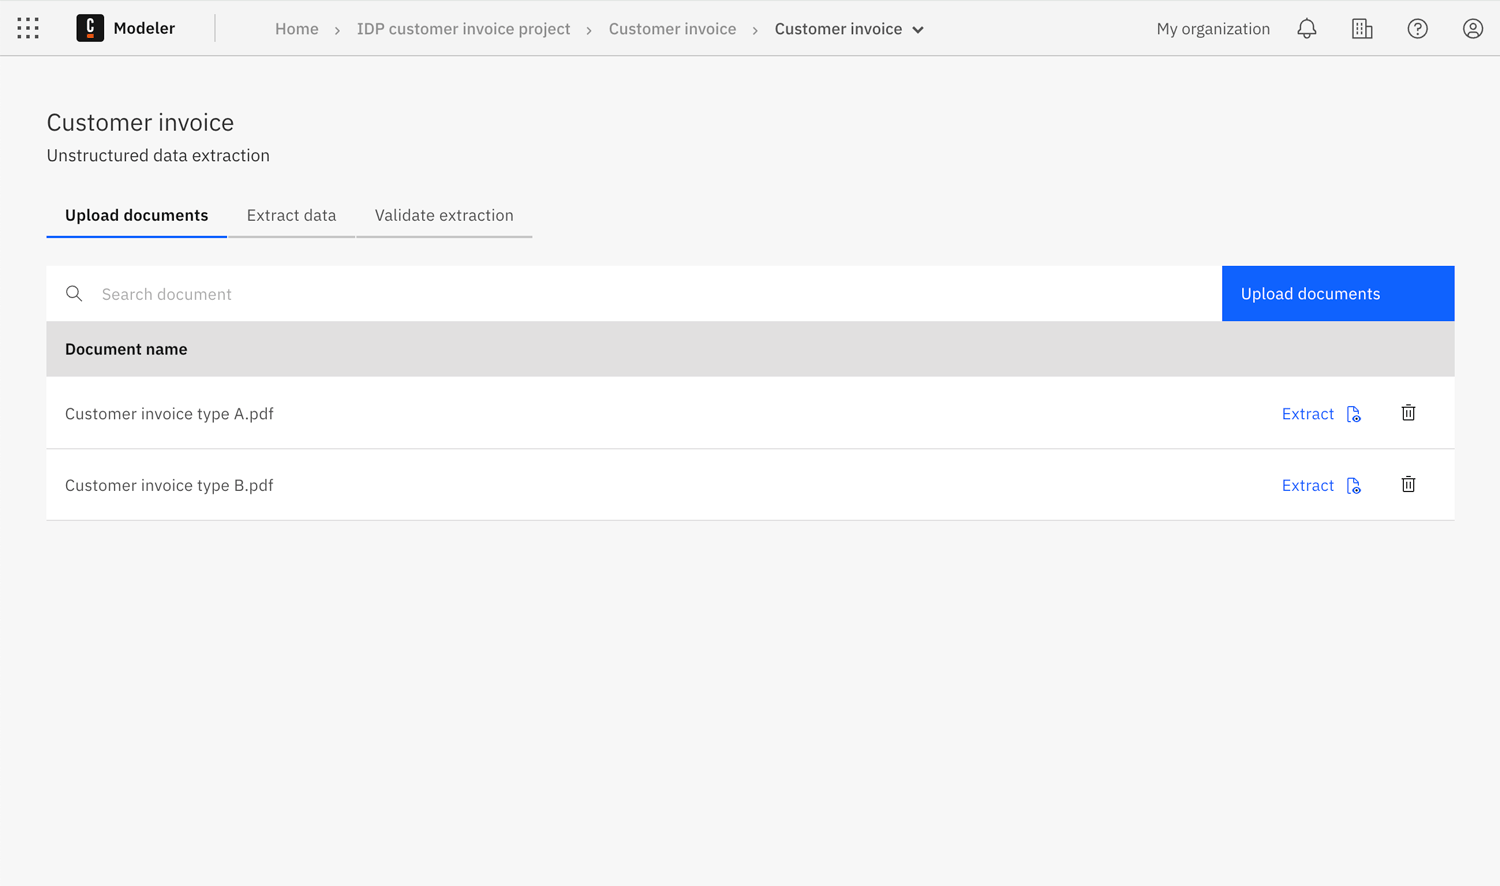
To upload your sample document(s):
- Click Upload documents to browse for and upload your sample document(s).
- Once you have finished uploading your sample document(s) and want to start testing data extraction, either:
- Select the Extract fields tab.
- Click the Extract icon for the document you want to extract data from.
Document upload guidelines
Start by uploading a sample document that contains all the data fields you want to extract for this type of document.
-
If a single document does not include all the data fields you require, upload multiple documents to cover all variations of the document type. The number and range of documents you need to upload depends on the complexity of your unstructured data and your requirements.
-
For example, you must upload at least one sample document for each variation of a document type. This should provide enough extraction accuracy if it is an exact representation of the specific type of document, with no variations in layout or content. However, it is more likely that you will need to upload multiple documents to ensure acceptable extraction accuracy.
-
When choosing your sample documents, variation is important to ensure the system captures the full range of document types it will encounter. As a general guideline, Camunda recommends starting with three to five documents, and uploading more as needed to represent the full range of possible data types.
Step 2: Extract fields
On the Extract fields tab, add the data extraction fields you want to populate with data from your document(s).
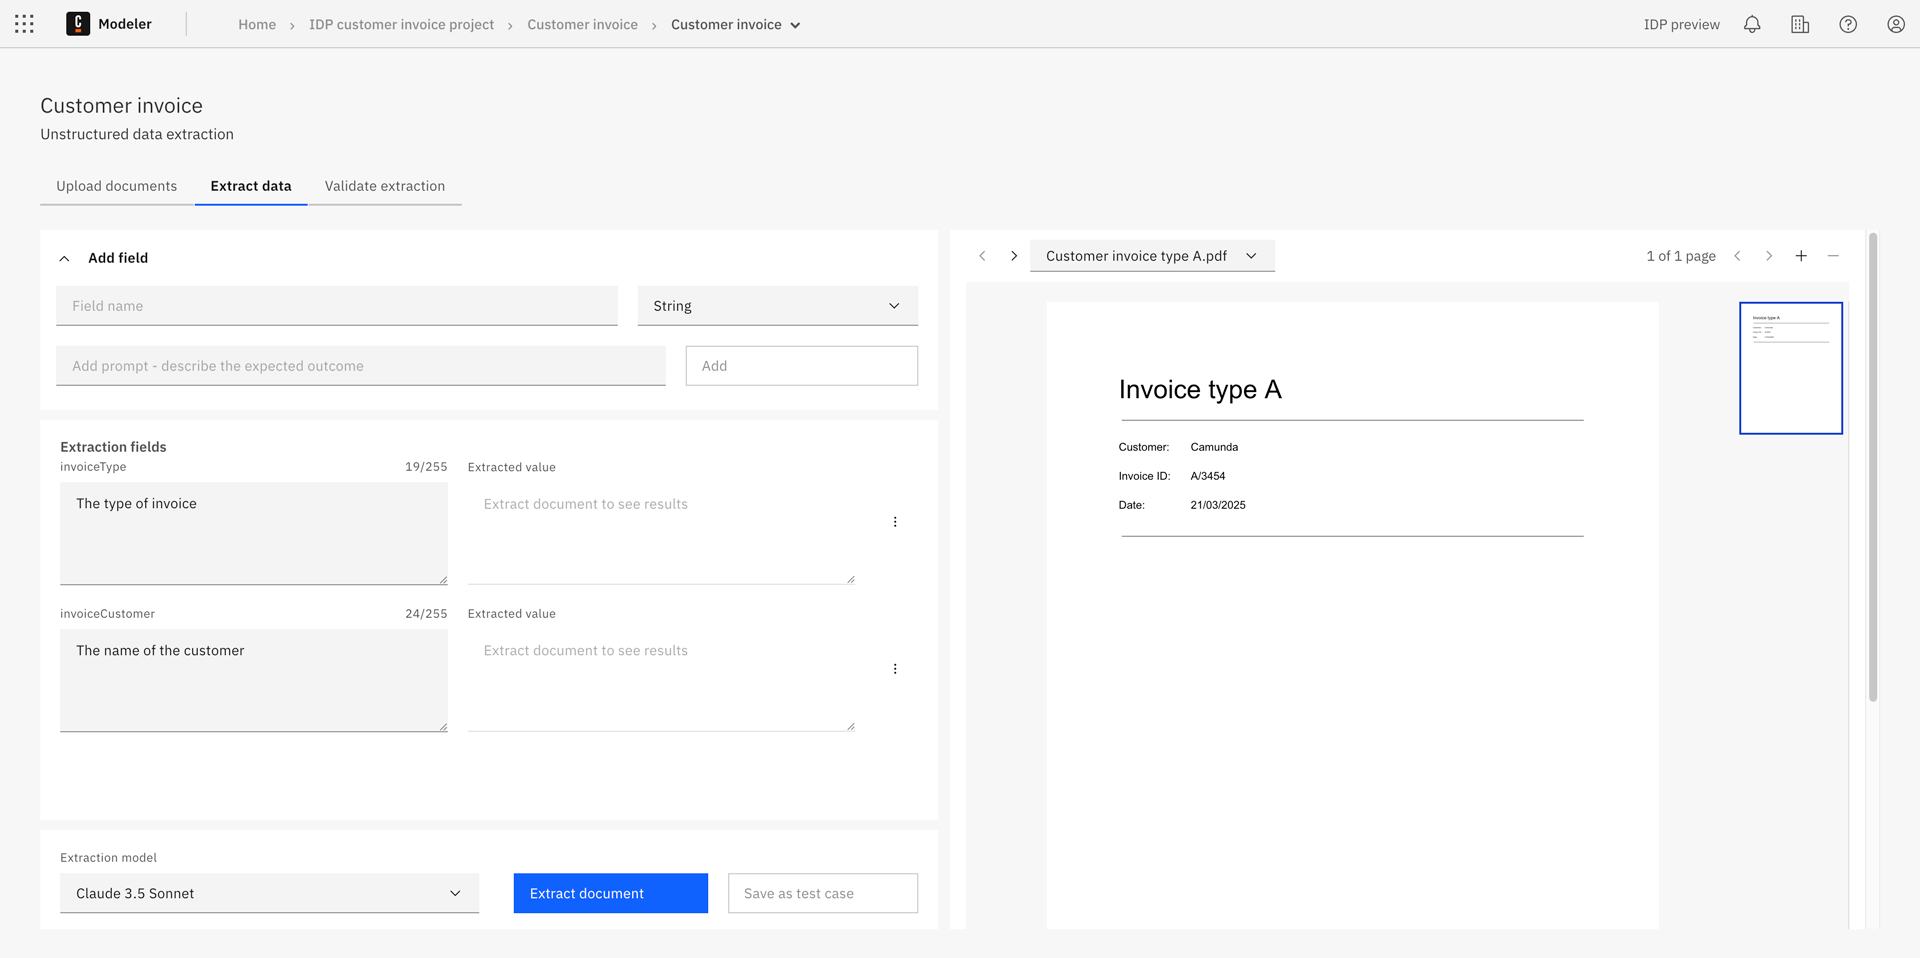
- Add a separate extraction field for each piece of information you want to extract. For example, for an invoice, you might add a field for the invoice ID, date, customer name, amount, and so on.
- You can then extract data from your sample document(s) using your chosen LLM extraction model, edit and refine your fields, and save the extracted data as a test case to compare outcomes across different extraction models.
Add extraction fields
Add an extraction field for each piece of data you want to extract from your document(s).
- Field name: Enter a descriptive name for the field.
- The name format should follow FEEL naming convention, for example it is case sensitive and should not include spaces.
- The Field name is used as an output variable in a BPMN process.
- Example: "invoiceId” or "invoice_id".
- Type: Select the data type you want/expect the field to be populated with.
- This helps the LLM more accurately extract data. See extraction field data types.
- Example: “Number” for a monetary field (“invoiceAmount”).
- Prompt: Enter a clear and specific prompt to guide the LLM in accurately extracting data.
- Try to describe the expected outcome in the prompt in clear and concise terms. For guidance and best practice when writing prompts, refer to the documentation for your chosen LLM extraction model.
- Example: For an "invoiceDate" field, you might use "The date when the invoice was issued".
- Click Add to add the field.
- Repeat the process until you have added all required extraction fields.
You can edit and delete extraction fields at any time. Click the three vertical dots next to the field to open the Options menu.
Extract data and save as test case
Once you have added your extraction fields, select a text extraction engine and LLM model, and test the data extraction.
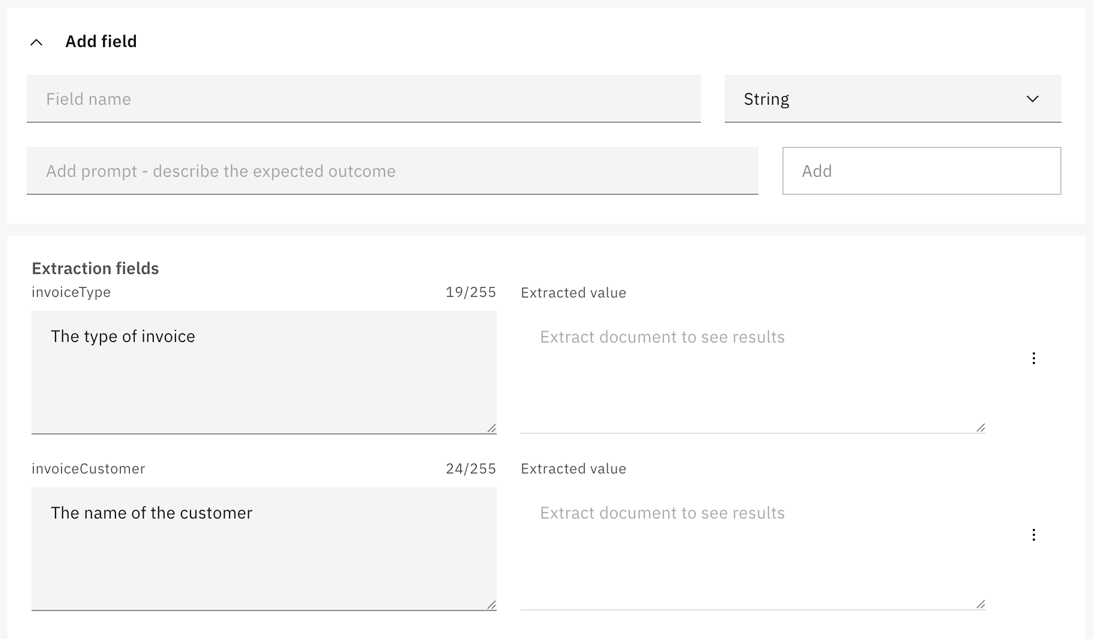
Extraction engine selection
With the Extraction engine dropdown, you can choose how text is extracted from your documents before the LLM processes the content. Select the engine that best matches your document type and processing needs:
- Fast Extract: A lightweight, built-in PDF text parser for digitally generated PDFs. This option is faster and lower cost, but does not support scanned or image-based documents.
- Multimodal: Sends the document directly to the LLM for native interpretation, bypassing a separate text extraction step. Useful when the LLM supports vision/multimodal capabilities.
- AWS Textract: Uses Amazon Textract OCR for high-accuracy text extraction from scanned or image-based documents.
- Azure Document Intelligence: Uses Azure AI Document Intelligence for OCR-based text extraction from scanned or image-based documents.
- GCP Document AI: Uses Google Cloud Document AI for OCR-based text extraction from scanned or image-based documents.
The available extraction engines depend on the cloud provider you configure for your document extraction template. For example, AWS Textract is only available when using the AWS provider.
Model selection
The Extraction model field is both a dropdown and an input field, giving you flexibility in model selection:
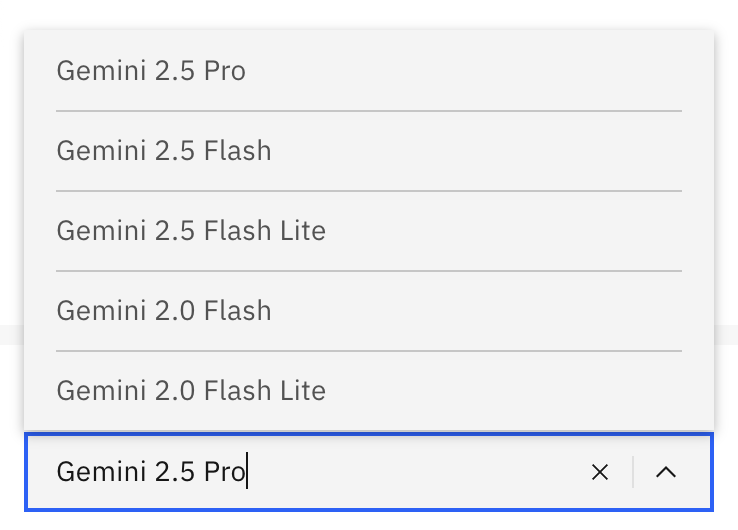
- Dropdown selection: Choose from a list of pre-configured models available in the dropdown.
- Custom model input: If you want to use a model ID that is not part of the dropdown, you can type it directly into the field. This is useful for custom models or specific model versions that may not be listed in the default options.
Extract and test
- Extraction engine: Select the text extraction engine you want to use.
- Extraction model: Select the LLM model you want to use.
- Select the document you want to test the data extraction against.
- Click Extract document.
- The Extraction fields are populated with the extracted document data.
- Check the extracted data is accurate and matches what you require from the document.
- For incorrect field results, edit the field Prompt and retry the data extraction until the results are accurate.
- Add additional fields as required during testing.
- Click Save as test case to save the results as a test case.
- The Expected output for each field is now shown below the actual extracted value.
- Any unexpected extraction results for the field are highlighted.
- (Optional) Test different LLM models with this test case to compare results and determine which model produces the most accurate extraction.
- Repeat the process of creating and evaluating a test case for your other uploaded sample documents.
- Once you are ready to validate your data extraction configuration, select the Validate extraction tab.
- Running an extraction creates a "test" process instance. You can view this in Operate.
- You will achieve different results using different extraction models and extraction engines. Test different combinations until you find the one that best suits your document type, budget, and accuracy requirements.
- You can save and overwrite a test case at any time with your latest results.
Step 3: Validate extraction
On the Validate extraction tab, test and validate the configured data extraction against your uploaded documents. This step evaluates the data extraction results produced by the selected extraction engine and LLM extraction model using your extraction fields and prompts.
Validate extraction
To validate the data extraction:
- Select the Extraction engine you want to use for validation.
- Select the Project extraction model you want to use for validation.
- Click Test documents to run the extraction validation against your uploaded sample documents.
- The extraction validation results are shown in the Test Case Results column.

- The validation status is shown for each field to indicate the accuracy of the data extracted from each document. For example, if the extracted value matches the expected test case output, it is shown as a “Pass”.
- Click on a field to expand the detailed results for each individual document.
- A Field extraction summary shows a summary percentage value for the overall extraction accuracy to allow you to quickly compare extraction accuracy between different LLM extraction models.

- Perform any actions required due to the validation results such as saving missing test cases or reviewing documents. If your validation results remain unsatisfactory, try the following before rerunning the validation:
- Change the extraction engine to try a different text extraction approach (for example, switch from PDF Parser to an OCR-based engine for scanned documents).
- Change the extraction model to try and obtain more accurate results with a different model.
- Edit your extraction field prompts. Select the three vertical dots on a field to open the actions menu, and select Edit.
- Go back to a previous step and edit your data extraction configuration, or upload more sample documents.
- Once you are satisfied with the extraction accuracy, extraction engine, and extraction model, publish the document extraction template.
Publish document extraction template
Publish the document extraction template to make it available for integration into your processes.
-
Click Publish and select either:
- Publish to project: Only users in the Web Modeler project can access the document extraction template.
- Publish to organization: The document extraction template is made available as a shared resource within your organization. This option is only available for organization owners or users with the Admin role.
-
On the Publish Extraction Project dialog, configure the publish settings.
- Extraction engine: Select the text extraction engine to use for the published document extraction template.
- Version name: Enter a version for the published document extraction template.
- Version description: Enter a description for the published document extraction template version.
- Extraction model: Select the extraction model you want to use for the published document extraction template.
-
Click Publish to make the document extraction template available for integration into your processes.
- The most recent Field extraction summary results are shown for your chosen Extraction engine and Extraction model combination.
Versions
Click Versions to view and manage your published document extraction template versions.

Compare versions
You can compare the change history between two template versions as JSON code in the diff layout.
- Ensure that the sidebar Show changes toggle is turned on.
- Select the version that you want to compare. The previous version is automatically selected for comparison.
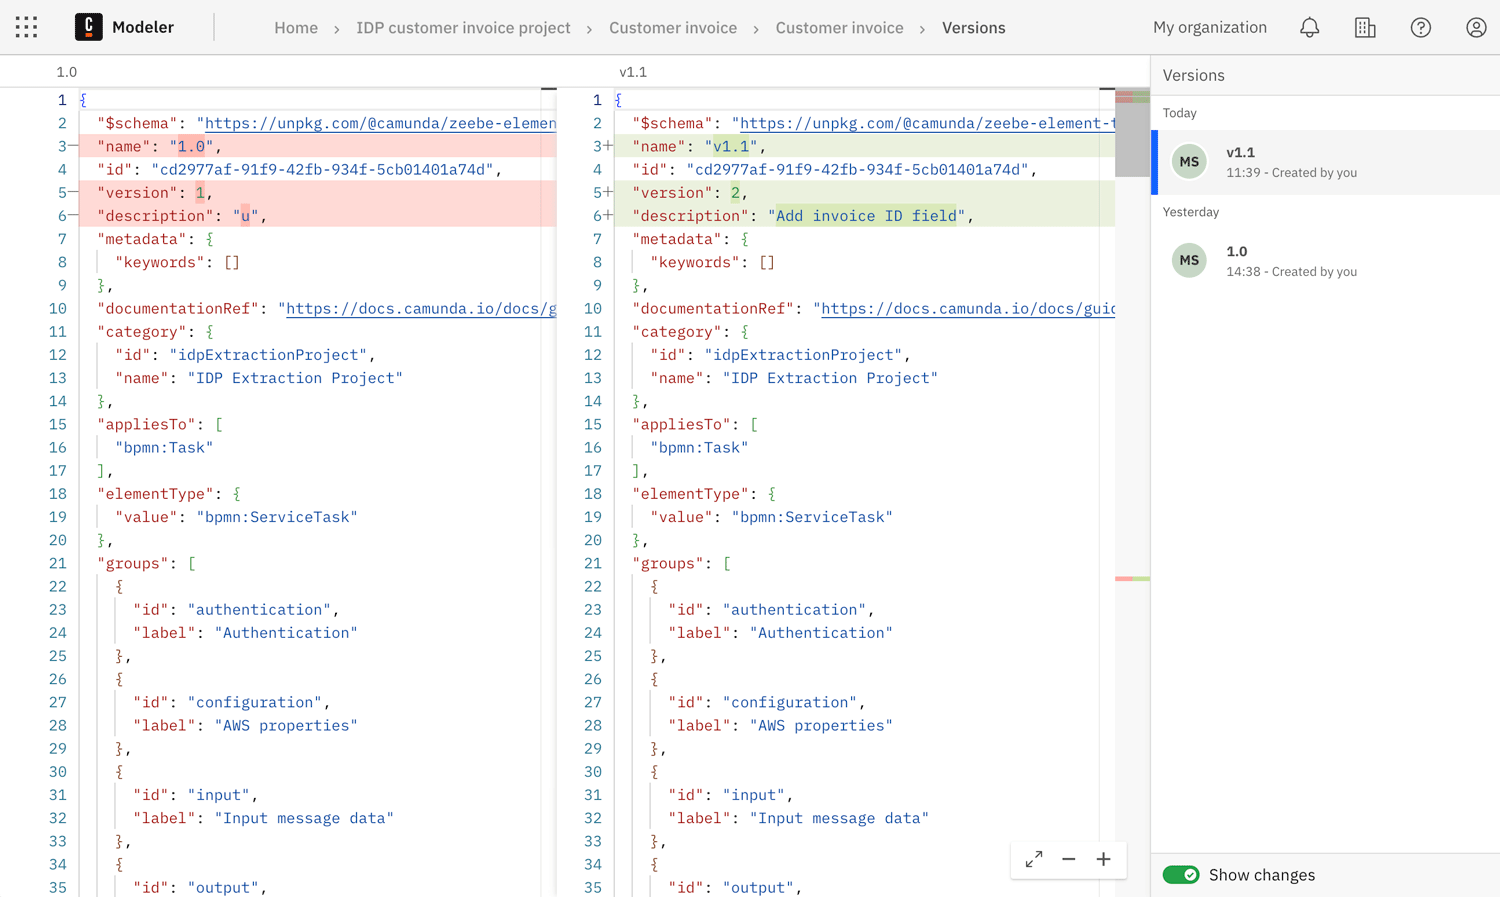
The JSON for the previous version is shown on the left, with the currently selected version shown on the right.
- Differences between the versions are highlighted in the JSON.
- For example, if an extraction field was added, this change is highlighted in green.
Restore a version
You can restore a version to revert to a previous snapshot of a document extraction template.
- In the sidebar Versions list, hover over the version you want to restore.
- Select the three vertical dots to open the actions menu.
- Select Restore as latest.
Update a version
You can update a version name and description at any time.
- In the sidebar Versions list, hover over the version you want to rename.
- Select the three vertical dots to open the actions menu.
- Select Edit and enter a new name and/or description for the version.
Delete a version
You can permanently delete a document extraction template version.
- In the sidebar Versions list, hover over the version you want to rename.
- Select the three vertical dots to open the actions menu.
- Select Delete.
- You are prompted to confirm the deletion.
- Select Delete version to permanently delete the version.
- Select Cancel to cancel the deletion and return to the versions list.
Deleting a document extraction template version is permanent.