Roles
A role is a collection of authorizations that defines a set of permissions.
About roles
Roles are used to grant users the system and data access required to fulfill a certain responsibility. A role can be assigned to users directly or as part of a group they belong to.
The Orchestration Cluster creates a set of default roles on startup. If deleted, they're automatically recreated on cluster startup.
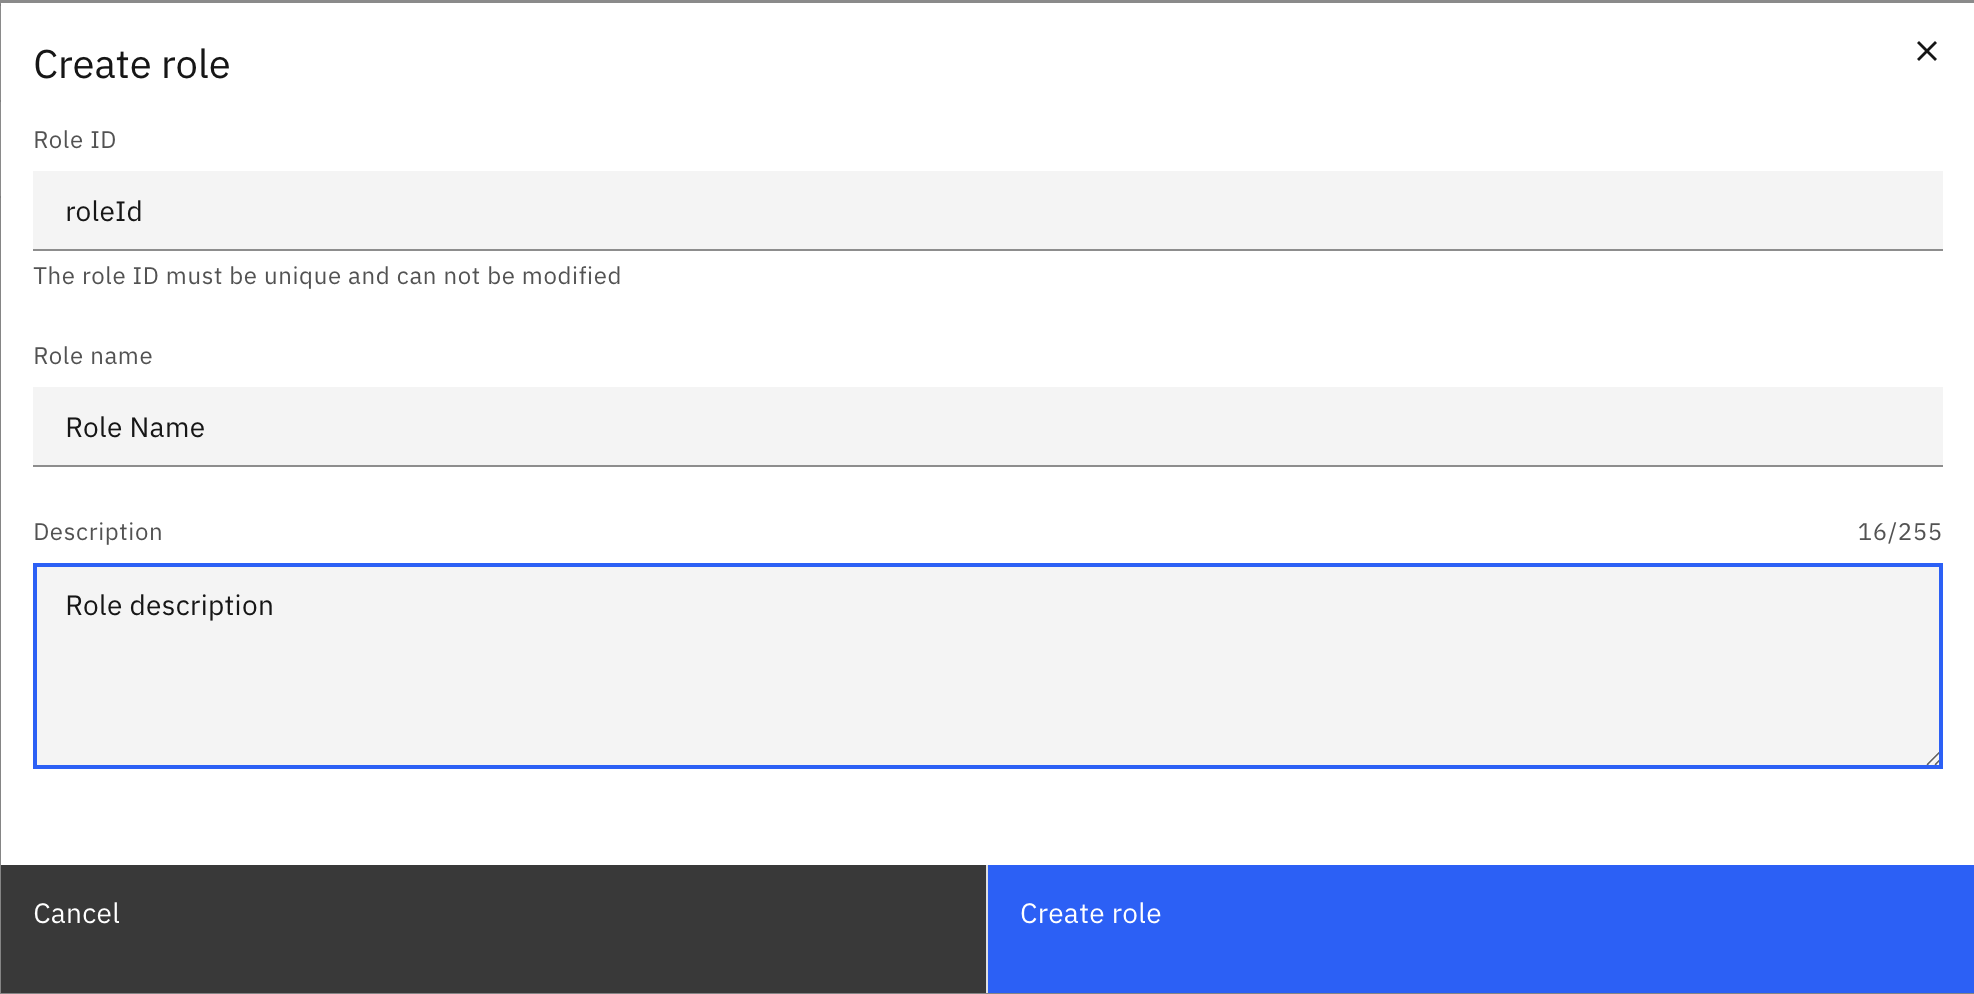
Create a role
To create a role:
- Log in to Identity in your cluster, and select the Roles tab.
- Click Create role, and enter the following role details:
- Role ID: The unique identifier for the role.
- Role name: The name of the role.
- Description: An optional description of the role.
- Click Create role.
The role is created and can now be assigned to users or groups.
Delete a role
To delete a role:
- Log in to Identity in your cluster, and select the Roles tab.
- Click Delete next to the role you want to delete.
- Confirm the deletion by clicking Delete in the confirmation dialog.
The role is deleted. The authorizations that were granted to the role are also removed.
Assign authorizations to a role
See authorizations to learn how to create authorizations for roles.
Manage users
Assign users to a role
To assign users to a role:
- Log in to Identity in your cluster, and select the Roles tab.
- Click on the role you want to assign users to.
- Select the Users tab.
- Click Assign user.
- Type the username of the user you want to assign to the role, and click Assign user. For SaaS deployments, the username field refers to the email address of the user. For Self-Managed deployments, the username field has to match the value of the claim configured as
username-claim.
For Self-Managed deployments with basic authentication, you must search for existing users.
The user is assigned to the role and inherits its permissions.
Remove users from a role
To remove users from a role:
- Log in to Identity in your cluster, and select the Roles tab.
- Click on the role you want to remove users from.
- Select the Users tab.
- Click Remove next to the user you want to remove from the role.
- Confirm the removal by clicking Remove in the confirmation dialog.
The user is removed from the role and loses any permissions that were granted through it.
Manage groups
Assign groups to a role
To assign groups to a role:
- Log in to Identity in your cluster, and select the Roles tab.
- Click on the role you want to assign users to.
- Select the Groups tab.
- Click Assign group.
- Type the ID of the group you want to assign to the role, and click Assign group.
The group is assigned to the role and inherits its permissions.
Remove groups from a role
To remove groups from a role:
- Log in to Identity in your cluster, and select the Roles tab.
- Click on the role you want to remove groups from.
- Select the Groups tab.
- Click Remove next to the group you want to remove from the role.
- Confirm the removal by clicking Remove in the confirmation dialog.
The group is removed from the role and loses any permissions that were granted through it.
Manage clients
In a Self-Managed deployment, client management is only available for OIDC authentication.
Assign client to a role
To assign a client to a role:
- Log in to Identity in your cluster, and select the Roles tab.
- Click on the role you want to assign a client to.
- Select the Clients tab.
- Click Assign client.
- Type the ID of the client you want to assign to the role, and click Assign client.
The client is assigned to the role.
Remove client from a role
To remove a client from a role:
- Log in to Identity in your cluster, and select the Roles tab.
- Click on the role you want to remove a client from.
- Select the Clients tab.
- Click Remove next to the client you want to remove from the role.
- Confirm the removal by clicking Remove in the confirmation dialog.
The client is removed from the role.
Manage mapping rules
Self-Managed onlyMapping rules are only available for OIDC authentication.
Assign mapping rules to a role
To assign mapping rules to a role:
- Log in to Identity in your cluster, and select the Roles tab.
- Click on the role you want to assign mapping rules to.
- Select the Mapping rules tab.
- Click Assign mapping rule.
- Search for the ID of the mapping rule you want to assign to the role, and click Assign mapping rule.
The mapping rule is assigned to the role.
Remove mapping rules from a role
To remove a mapping rule from a role:
- Log in to Identity in your cluster, and select the Roles tab.
- Click on the role you want to remove mapping rules from.
- Select the Mapping rules tab.
- Click Remove next to the mapping rule you want to remove from the role.
- Confirm the removal by clicking Remove in the confirmation dialog.
The mapping rule is removed from the role.