SOAP connector
The SOAP connector is only supported by Self-Managed and Hybrid Camunda 8 instances.
Simple Object Access Protocol (SOAP) is a messaging protocol specification for exchanging structured information in the implementation of web services in computer networks.
The SOAP connector allows you to interact with SOAP service endpoints from your BPMN process.
Prerequisites
To use the SOAP connector, ensure you have an active SOAP service.
Create a SOAP connector task
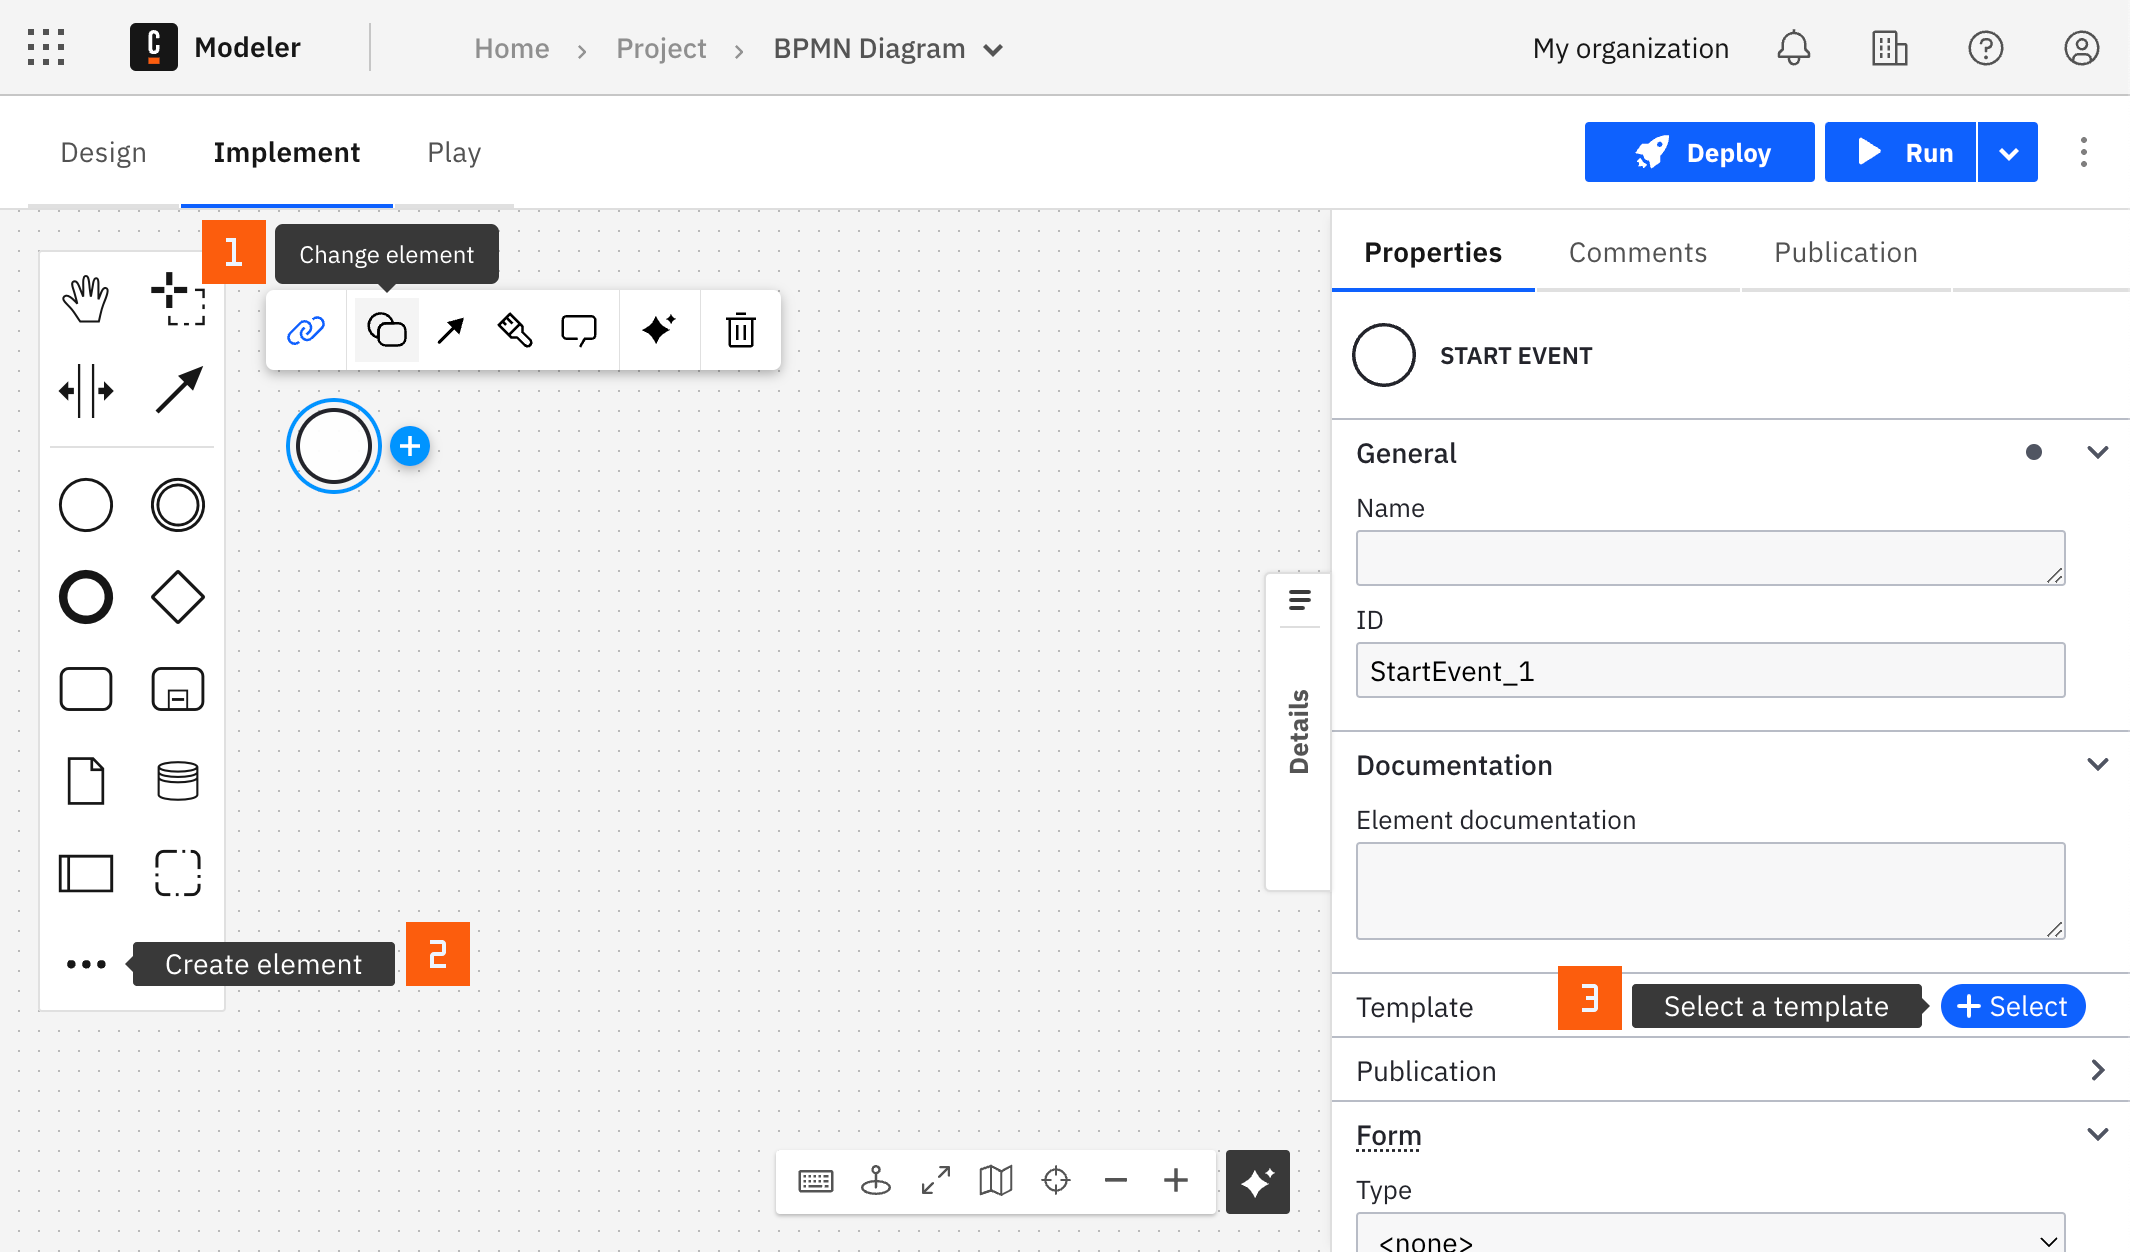
You can apply a connector to a task or event via the append menu. For example:
- From the canvas: Select an element and click the Change element icon to change an existing element, or use the append feature to add a new element to the diagram.
- From the properties panel: Navigate to the Template section and click Select.
- From the side palette: Click the Create element icon.
After you have applied a connector to your element, follow the configuration steps or see using connectors to learn more.
Connection
Enter your SOAP service URL in the field Service URL, for example https://myservice.com/service/MyService.wso.
Authentication
Select the authentication type from the Authentication dropdown.
None
Use None if the SOAP service does not require authentication.
WSS username token
Use WSS username token in the Authentication dropdown when the requested SOAP endpoint requires username token extension.
Enter Username, Password, and indicate if the password is encoded.
The SOAP connector currently supports only SHA-1 password encoding.
WSS signature
Use the WSS signature in the Authentication dropdown when the requested SOAP endpoint requires a message to be cryptographically signed with a signature.
Enter all necessary fields according to your service specification.
SOAP message
SOAP version
Select the desired version of the SOAP service.
SOAPAction HTTP header
Enter the SOAPAction HTTP header that will be used in the request. Leave this value blank if the SOAPAction HTTP header won't be used in your request. This field is only required by SOAP version 1.1.
SOAP header
From the dropdown, select whether the SOAP header is required, and if so, in which format you wish to provide it.
SOAP body
From the SOAP body dropdown, select whether you will provide the SOAP request body in a form of Template, or XML compatible JSON.
Template
When Template is chosen, enter the XML template value, for example <camunda:Param><camunda:ParamType>{{paramValue}}</camunda:ParamType></camunda:Param>.
Enter the XML template context value, for example ={paramValue: 1234567890}, and enter the Namespaces value, for example ={"camunda":"http://my.service.com/webservicesserver/"}.
XML compatible JSON
When XML compatible JSON is chosen, enter the JSON definition, for example
= {
  "camunda:Object01": {
    "camunda:Object02": myObjectValue
  }
}
Enter the Namespaces value, for example ={"camunda":"http://my.service.com/webservicesserver/"}.
Output mapping
Result variable
You can export a complete response from a SOAP call into a dedicated variable accessible anywhere in a process. To do so, input a variable name in the Result variable field. Use a unique name to avoid overwriting variables.
A typical response may look like as follows:
{
  "Envelope": {
    "Header": {
      "MyHeader": "Header value"
    },
    "Body": {
      "MyResponseObject": {
        "MyResponseObjectField": "My result value"
      }
    }
  }
}
Result expression
Additionally, you can choose to unpack the content of your response into multiple process variables using the Result expression, which is a FEEL Context Expression.
Given SOAP service response that looks like as follows:
{
  "Envelope": {
    "Header": {
      "MyHeader": "Header value"
    },
    "Body": {
      "MyResponseObject": {
        "MyResponseObjectField": "My result value"
      }
    }
  }
}
To extract the MyResponseObjectField value into its own variable, you can do:
= {
    MyResponseObjectResult: response.Envelope.Body.MyResponseObject.MyResponseObjectField
}
Usage examples
Example 1
For example, imagine you want to send the following SOAP request:
URL: https://myservice:8888/webservice.wso
Body:
<?xml version="1.0" encoding="utf-8"?>
<soap:Envelope xmlns:soap="http://schemas.xmlsoap.org/soap/envelope/">
  <soap:Body>
    <Object01>
      <Object02>12345</Object02>
    </Object01>
  </soap:Body>
</soap:Envelope>
In your BPMN diagram, set the field Service URL as https://myservice:8888/webservice.wso, and SOAP body as:
{
  "Object01": {
    "Object02": 12345
  }
}
Example 2: Pre-defined namespaces
Consider a namespace is defined within your objects, and you want to send the following request:
URL: https://myservice:8888/webservice.wso
Body:
<?xml version="1.0" encoding="utf-8"?>
<soap:Envelope xmlns:soap="http://schemas.xmlsoap.org/soap/envelope/">
  <soap:Body>
    <Object01 xmlns="http://www.my.namespace.com/namespace/">
      <Object02>12345</Object02>
    </Object01>
  </soap:Body>
</soap:Envelope>
In your BPMN diagram, set the field Service URL as https://myservice:8888/webservice.wso, and SOAP body as:
{
  "ns:Object01": {
    "ns:Object02": 12345
  }
}
Here, we introduced a new ns: prefix. The prefix can be any arbitrary string that is not defined as a namespace.
Now, you'll need to associate a namespace. Set the following value at the Namespaces field. For the given example, it should be set as:
{
  "ns": "http://www.my.namespace.com/namespace/"
}
Example 3: Using templates
As an alternative, you can use templates to send SOAP messages.
URL: https://myservice:8888/webservice.wso
Body:
<?xml version="1.0" encoding="utf-8"?>
<soap:Envelope xmlns:soap="http://schemas.xmlsoap.org/soap/envelope/">
  <soap:Body>
    <Object01>
      <Object02>12345</Object02>
    </Object01>
  </soap:Body>
</soap:Envelope>
Set the SOAP body dropdown to Template.
In the XML template field, define the template. For example:
<Object01>
  <Object02>{{myObjectValue}}</Object02>
</Object01>
In the XML template context field, define context JSON. For example:
{
  "myObjectValue": 12345
}