EasyPost connector
The EasyPost connector is an outbound connector that allows you to create addresses, parcels, and shipments, as well as purchase and verify shipments with EasyPost Service from your BPMN process.
Prerequisites
To use the EasyPost connector, sign up for an EasyPost account, enter your carrier-specific credentials on the Carrier Account Dashboard, and get your API key.
Use Camunda secrets to avoid exposing your EasyPost API key as plain text. Refer to our documentation on managing secrets to learn more.
Create an EasyPost connector task
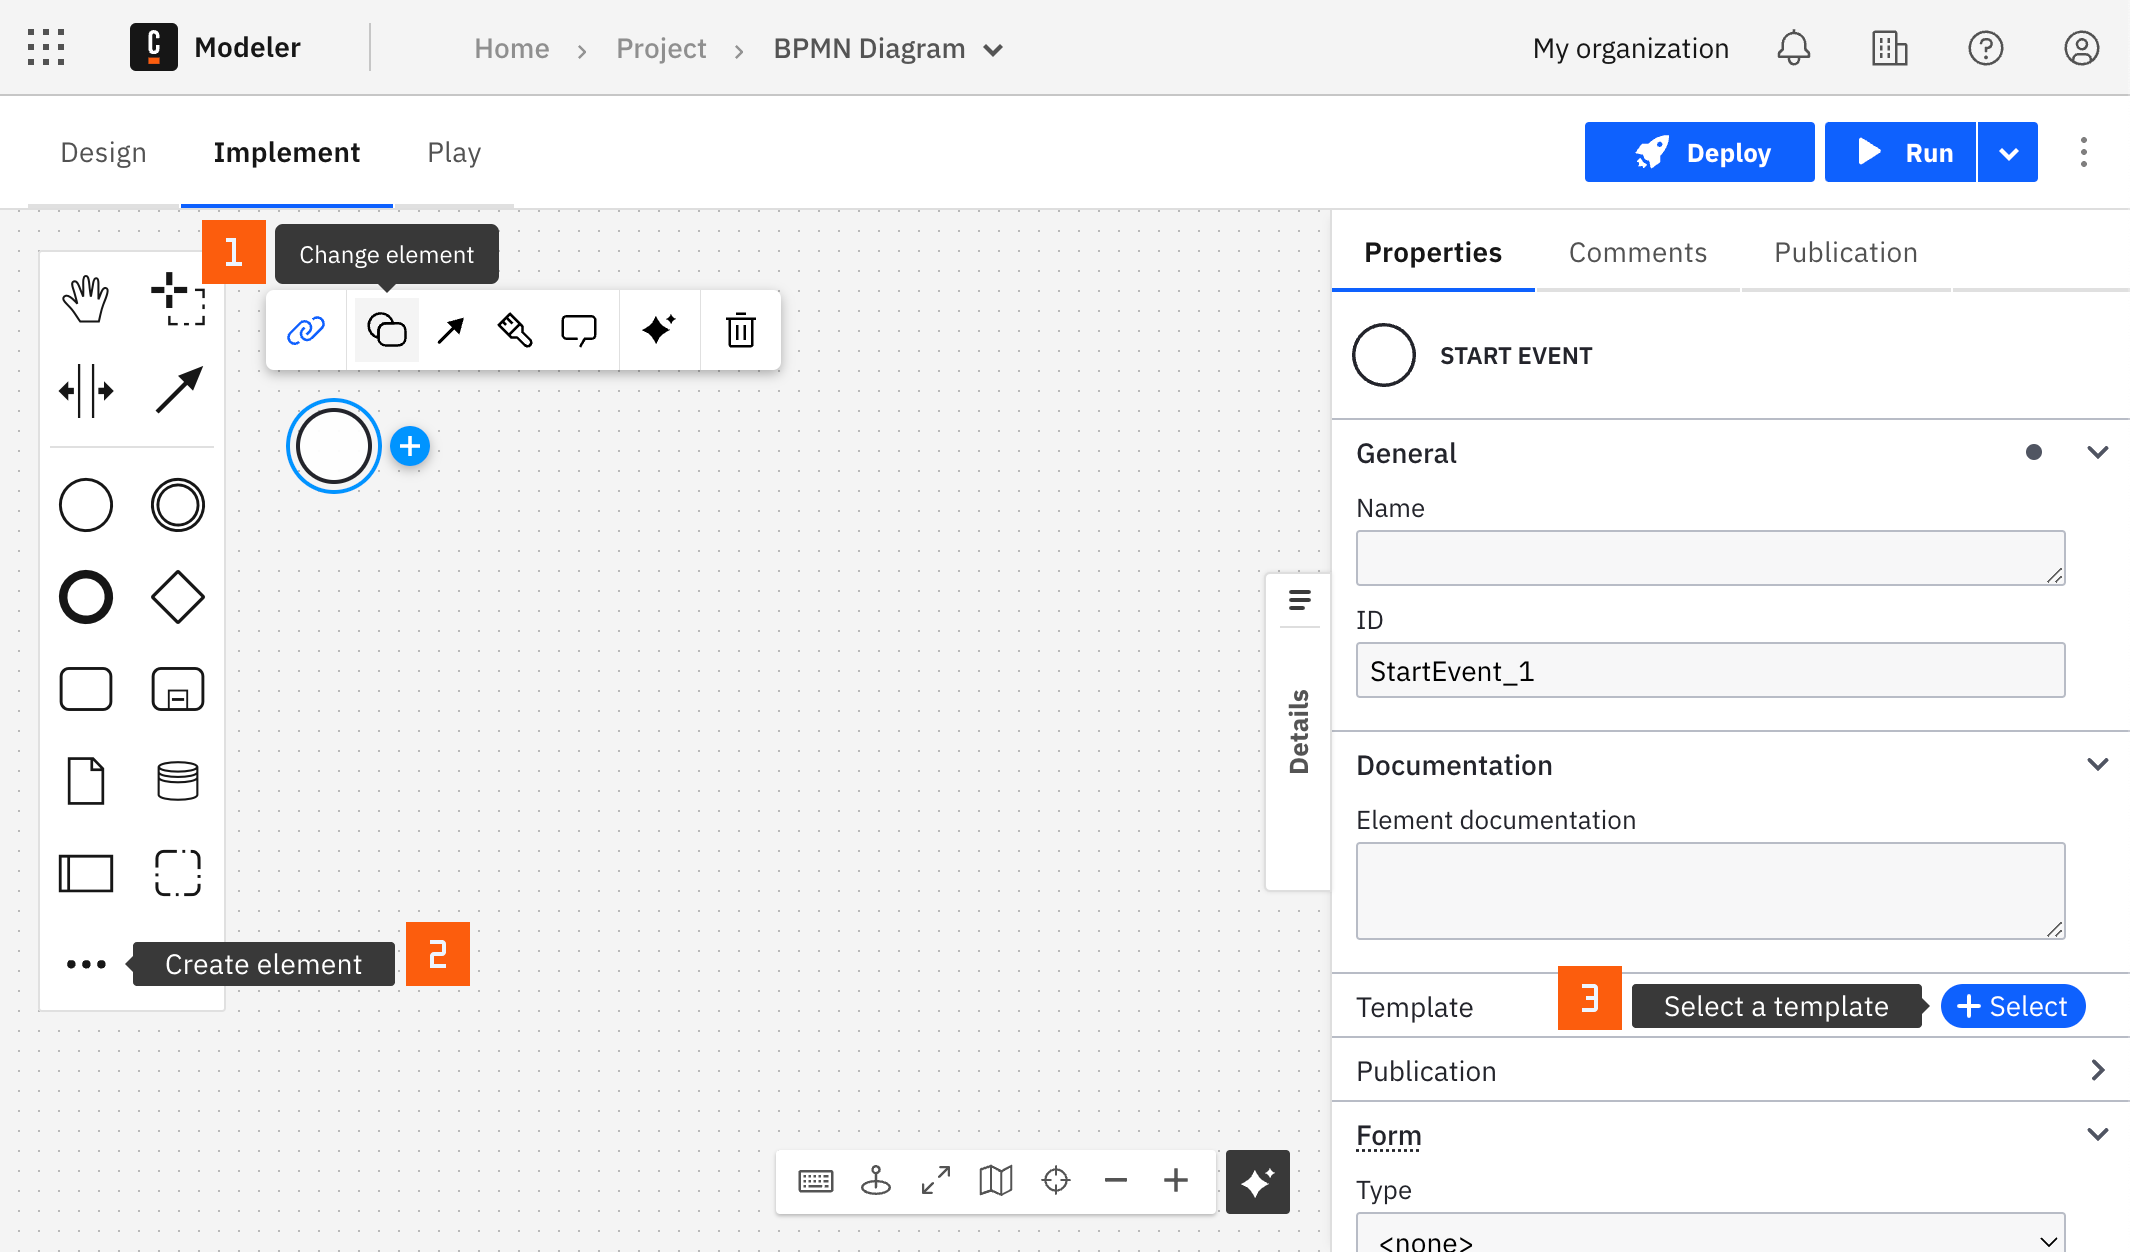
You can apply a connector to a task or event via the append menu. For example:
- From the canvas: Select an element and click the Change element icon to change an existing element, or use the append feature to add a new element to the diagram.
- From the properties panel: Navigate to the Template section and click Select.
- From the side palette: Click the Create element icon.
After you have applied a connector to your element, follow the configuration steps or see using connectors to learn more.
Authentication
In the Authentication section, provide an API key, which you can find in the API Key dashboard.
Select operation to execute
The EasyPost connector currently supports the following operations:
Create address
Allows you to create an address, save it, and get an address ID to use in follow-up operations. Set address information in the Input section. Refer to address object documentation to learn more about address object and to observe response examples.
Verify a created address
Allows you to verify an address by Address ID and return verified address object.
Create a parcel
Allows you to create a parcel, save it, and get a parcel ID to use in follow-up operations. Set required properties in the Input section. Refer to the parcel object documentation to learn more about the parcel object and to observe response examples.
Create a shipment
Allows you to create a shipment, save it, and get the shipment ID for use in follow-up operations. Set required properties in the Input section: ID of destination address, ID of origin address, and ID of parcel. Refer to the shipment object documentation to learn more about the shipment object and to observe response examples. In the Output section, the pre-filled Result Expression returns the ID of the shipment and the ID of rate.
FEEL expression:
{priorityRate: response.body.rates[item.service = "Priority"], shipmentId: priorityRate[1].shipment_id, rateId: priorityRate[1].id}
Response:
{
      "shipment_id": "shp...",
      "rateId": "rate...."
 }
Buy a shipment
Allows you to buy a shipment. Set required properties in the Input section: IDs of rate and shipment. Refer to the shipment object documentation to learn more about the shipment object and to observe response examples. In the Output section the pre-filled Result Expression returns the ID of a tracker, tracking code, and status of the shipment.
FEEL expression:
{trackerId: response.body.tracker.id, trackingCode: response.body.tracking_code, shipmentstatus:response.body.status}
Response:
{
      "shipmentstatus": "shp...",
      "trackerId": "trk....",
      "trackingCode: :"track...."
 }
Retrieve a tracker by ID
Allows you to retrieve a tracker by ID and get information about the status of the tracker. Set required properties in the Input section: Tracker ID fetched after buying shipment). Refer to the tracker object documentation to learn more about the tracker object and to observe response examples. In the Output section, the pre-filled Result Expression returns the ID of the tracker, tracking code, and status of the shipment.
FEEL expression:
{trackerStatus: response.body.status}
Handle connector response
The EasyPost connector is a protocol connector, meaning it is built on top of the HTTP REST connector, therefore handling response is still applicable as described.