Build your first AI agent
Get started with Camunda agentic orchestration by building and running your first AI agent.
About
AI agents represent the practical implementation of agentic process orchestration within Camunda, combining the flexibility of AI with the reliability of traditional process automation.
In Camunda, an AI agent refers to an automation solution that uses ad-hoc sub-processes to perform tasks with non-deterministic behavior.
In this guide, you will:
- Run your AI agent using Camunda 8 SaaS or locally with Camunda 8 Self-Managed.
- Use an AI Agent connector to provide interaction and reasoning capabilities to the AI agent.
- Use an ad-hoc sub-process to define the tools the AI agent should use.
- Integrate a Large Language Model (LLM) into your AI agent.
After completing it, you will have an example AI agent running in Camunda 8.
Prerequisites
To build your first AI agent, see the prerequisites below depending on:
- Your working environment.
- Your chosen model.
Camunda 8 environment
To run your agent, you must have Camunda 8 (version 8.8 or newer) running, using either:
- Camunda 8 SaaS. For example, sign up for a free SaaS trial account.
- Camunda 8 Self-Managed. For example, follow Run your first local project.
Supported models
With the AI Agent connector, you can integrate frontier models from providers like Anthropic and Amazon Bedrock, or connect to open-weight models you host yourself on any OpenAI-compatible platform. See supported model providers for all options.
Frontier models are billed per token. That works well for complex reasoning, but costs scale with volume. Self-hosted open-weight models use a fixed infrastructure cost instead, so routine decisions stay affordable as volume grows. Use a frontier model where nuanced judgment matters, and use a self-hosted model where decisions are simple and high-volume.
In this guide, you can try the following use cases:
| Setup | Model provider | Model used | Prerequisites |
|---|---|---|---|
| SaaS | Camunda-provided LLM | Camunda-managed model (for example, Claude Sonnet 4.6) |
|
| Cloud (customer-managed) | AWS Bedrock | Claude Sonnet 4 |
|
| Local | Ollama | GPT-OSS:20b |
|
Running LLMs locally requires substantial disk space and memory. GPT-OSS:20b requires more than 20GB of RAM to function and 14GB of free disk space to download.
Step 1: Install the model blueprint
To start building your first AI agent, you can use a Camunda model blueprint from Camunda Marketplace.
In this guide, you will use the AI Agent Chat Quick Start model blueprint. Depending on your working environment, follow the corresponding steps below.
- SaaS
- Self-Managed
- In the blueprint page, click For SAAS and select or create a project to save the blueprint.
- The blueprint BPMN diagram opens in Web Modeler.
- In the blueprint page, click For SM and download the blueprint files from the repository.
If you’re using Camunda 8 Run and installed it using the starter package, the blueprint was already downloaded as part of it.
- Open the blueprint BPMN diagram in Desktop Modeler.
About the example AI agent process
The example AI agent process is a chatbot that you can interact with via a user task form.

This process showcases how an AI agent can:
- Make autonomous decisions about which tasks to execute based on your input.
- Adapt its behavior dynamically using the context provided.
- Handle complex scenarios by selecting and combining different tools.
- Integrate seamlessly with other process components.
The example includes a form linked to the start event, allowing you to submit requests ranging from simple questions to more complex tasks, such as document uploads.
To make this agent reliable, treat each activity in the ad-hoc sub-process as a documented tool. Learn why this matters in Design and architecture: Define your agent tools.
For a runtime view of what the LLM decides vs. what Camunda orchestrates, see Design and architecture: How execution works in an AI agent.
For prompt configuration details, see AI Agent connector: System prompt, user prompt, and tool descriptions.
Step 2: Configure the AI Agent connector
Depending on your model choice, configure the AI Agent connector accordingly.
With Camunda-provided LLM, you do not need additional LLM setup.
Camunda-provided LLM is only available in SaaS. It is not available in Self-Managed environments.
- Camunda-provided LLM
- AWS Bedrock
- Ollama
- Verify your organization has AI features enabled. Camunda-provided LLM is available automatically when AI features are enabled.
- Keep the AI Agent connector's default settings from the blueprint. Most AI blueprints default to use Camunda-provided LLM in SaaS. You only need to configure a customer-managed provider if you want custom billing, quotas, or provider control.
See Camunda-provided LLM for more details.
Configure the connector's authentication and template for AWS Bedrock.
Configure authentication
The example blueprint downloaded in step one is preconfigured to use AWS Bedrock. For authentication, it uses the following connector secrets:
AWS_BEDROCK_ACCESS_KEY: The AWS Access Key ID for your AWS account able to call the Bedrock Converse API.AWS_BEDROCK_SECRET_KEY: The AWS Secret Access Key for your AWS account.
You will configure these secrets differently depending on your working environment.
- SaaS
- Self-Managed
Configure the secrets using the Console.
Export the secrets as environment variables before starting the distribution. See Connector secrets for details.
See Amazon Bedrock model provider for more information about other available authentication methods.
Configure properties
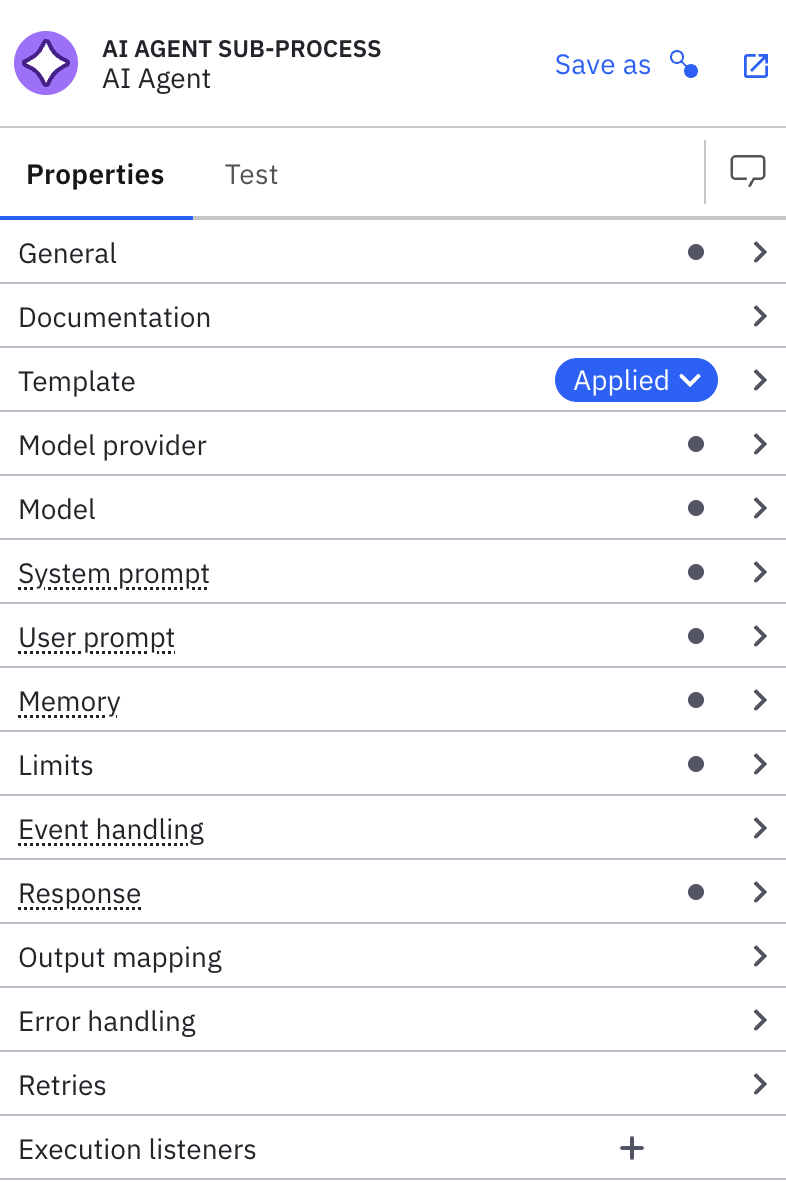
In the blueprint BPMN diagram, the AI agent is implemented using the AI Agent Sub-process connector.
You can keep the default configuration or adjust it to test other setups. To do so, use the properties panel:
When configuring connectors, use FEEL expressions, by clicking the fx icon, to reference process variables and create dynamic prompts based on runtime data.
Configure your local LLM with Ollama.
Set up Ollama
- Download and install: Follow Ollama's documentation for details.
- Confirm installation: Check the installed version in a terminal or command prompt by running
ollama --version. - Start the local server: Start it using the application, or run
ollama servein a terminal or command prompt. - Pull the GPT-OSS:20b model: If it isn't installed by default, run
ollama pull gpt-oss:20bin a terminal or command prompt to download the model. - Test: Ollama serves an API at
http://localhost:11434by default. To test it, open that URL in a browser or run this command in your terminal:
curl -X POST http://localhost:11434/v1/chat/completions \
    -H "Content-Type: application/json" \
    -d '{"model":"gpt-oss:20b","messages":[{"role":"user","content":"Hello!"}]}'
Configure properties
The example blueprint downloaded in step one is preconfigured to use AWS Bedrock. Update the connector's configuration using the Model provider and Model sections to use Ollama instead.
Model provider
- Select OpenAI Compatible from the Provider dropdown.
- Enter
http://localhost:11434/v1in the API endpoint field. This is Ollama's default API URL. - No authentication or additional headers are required for the local Ollama API, so leave the remaining fields blank.
Model
- Enter
gpt-oss:20bin the Model field. This field is case-sensitive, so be sure to enter it in all lowercase.
Step 3: Test your AI agent
Deploy and run your AI agent in your Camunda cluster.
Whether you are testing your agent in Camunda 8 SaaS or locally with Camunda 8 Self-Managed, make sure you’re running a cluster with version 8.8 or higher.
Depending on your working environment, test your agent by following the corresponding steps below.
- SaaS
- Self-Managed
- Open Web Modeler.
- Select the Play tab.
- Select the cluster you want to deploy and play the process on.
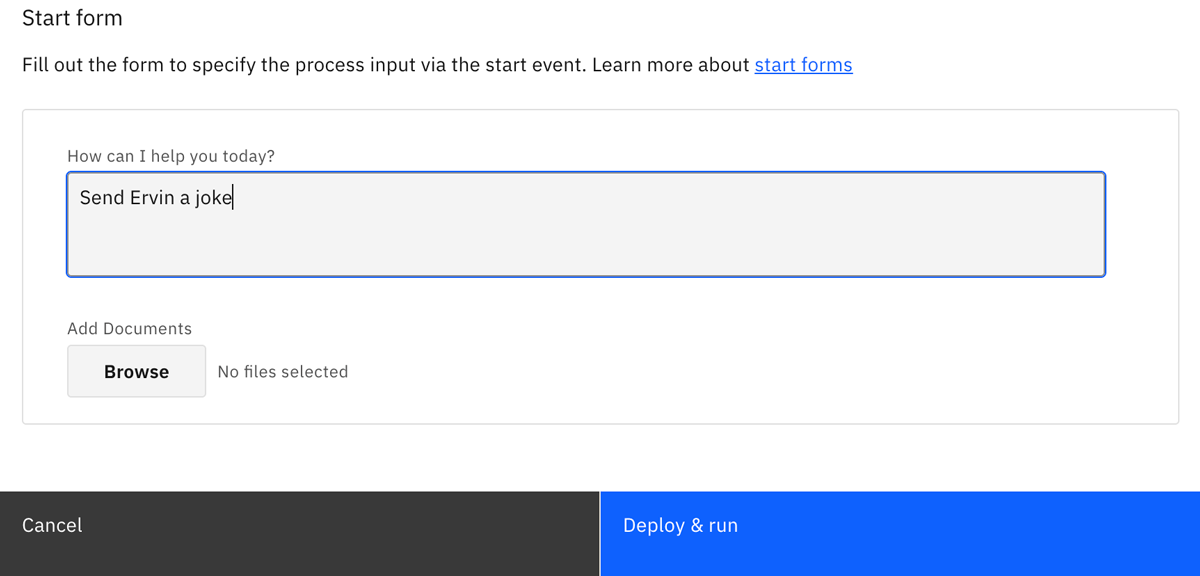
- Open the Start form and add a prompt for the AI agent. For example, enter "Tell me a joke" in the How can I help you today? field, and click Start instance.
- The AI agent analyzes your prompt, decides what tools to use, and responds with an answer. Open the Task form to view the result.
- You can monitor the process execution in Operate.
- You can follow up with more prompts to continue testing the AI agent. Select the Are you satisfied with the result? checkbox when you want to finish your testing and complete the process.
Instead of using Play, you can also test the process within the Implement tab using Deploy & Run, and use Tasklist to complete the form.
- Deploy the process model to your local Camunda 8 environment using Desktop Modeler.
- Open Tasklist in your browser at http://localhost:8080/tasklist.
- On the Processes tab, find the
AI Agent Chat With Toolsprocess and click Start process. - In the start form, add a prompt for the AI agent. For example, enter "Tell me a joke" in the How can I help you today? field, and click Start process.
- The AI agent analyzes your prompt, decides what tools to use, and responds with an answer.
- Select the Tasks tab in Tasklist. When the AI agent finishes processing, you should see a
User Feedbacktask waiting for you to complete. - You can monitor the process execution in Operate. Open it in your browser at http://localhost:8080/operate.
- You can follow up with more prompts to continue testing the AI agent. Select the Are you satisfied with the result? checkbox when you want to finish the process.
What to expect during execution
When you run the AI agent process:
- The AI agent receives your prompt and analyzes it together with the configured system prompt and tool descriptions.
- The LLM determines which tools from the ad-hoc subprocess should be activated.
- Camunda executes the selected BPMN activities.
- Tasks can execute in parallel or sequentially, depending on the agent's decisions and process state.
- Process variables are updated as each tool completes its execution.
- The agent may iterate through multiple tool calls to handle complex requests.
You can observe this dynamic behavior in real-time through Operate, where you'll see which tasks were activated and in what order.
Step 4: Add your first tool
You can customize your AI agent by adding tools. In this section, you will add a tool that fetches weather conditions for a given location using the Open-Meteo API.
Add a REST connector task
- Inside the AI agent sub-process, add a new task element.
- Change the task type to REST Outbound Connector using the Change element menu.
- Name the task. For example,
Get current weather. This name is visible to the LLM as the tool name.
Write a tool description
The LLM selects tools based on their description. Open the Documentation field in the properties panel and add a clear description of what the tool does and when to use it. For example:
Fetches current weather conditions for a given location. Use this tool when the user asks about weather, temperature, wind, or climate conditions for a city or place. Returns temperature in Celsius, wind speed, and a weather description.
Provide as much context as possible in tool descriptions to help the LLM select the right tool and generate proper inputs.
Configure the REST connector
Set up the HTTP request in the properties panel:
-
In the Authentication section, select None.
-
In the HTTP Endpoint section:
-
Set Method to GET.
-
Set URL to the following FEEL expression by clicking the
fxicon:"https://api.open-meteo.com/v1/forecast" -
Set Query parameters to:
{
    latitude: fromAi(toolCall.latitude, "Latitude of the location to check weather for", "string"),
    longitude: fromAi(toolCall.longitude, "Longitude of the location to check weather for", "string"),
    current: "temperature_2m,wind_speed_10m,weather_code"
} -
The fromAi() calls tell the AI Agent connector which parameters the LLM must provide. At runtime, the LLM generates the latitude and longitude values based on the user's request, while the current parameter is a fixed value that selects which weather fields to return.
Map the response to toolCallResult
Each tool within the AI agent sub-process must return its result in a toolCallResult variable so the AI Agent connector can pass it back to the LLM.
In the Output Mapping section, set Result Expression to:
{
    toolCallResult: {
        latitude: response.body.latitude,
        longitude: response.body.longitude,
        temperature_celsius: response.body.current.temperature_2m,
        wind_speed_kmh: response.body.current.wind_speed_10m,
        weather_code: response.body.current.weather_code
    }
}
This extracts the relevant fields from the Open-Meteo API response and returns them in a structure the LLM can interpret and summarize for the user.
Test the new tool
Deploy the updated process and start a new instance. Try prompts like:
- "What's the weather in Paris right now?"
- "Is it windy in Tokyo?"
- "Tell me the temperature in New York"
The LLM will recognize these as weather requests, select the Get current weather tool, provide the appropriate latitude and longitude values, and summarize the response in natural language.
Add your own tools
To add more tools to your agent, follow the same pattern:
- Add a task inside the ad-hoc sub-process and apply a connector or configure a job worker.
- Write a clear tool name and Documentation description so the LLM knows when to use it.
- Use
fromAi()in input mappings to define the parameters the LLM must provide. - Return
toolCallResultin the result expression or output mapping.
At runtime, each tool call produces one toolCallResult, and the ad-hoc multi-instance output collection aggregates them into toolCallResults for the AI Agent connector.
For more examples, review the tasks already available in this blueprint and the AI Agent tool definitions documentation.
Next steps
Now that you’ve built your first Camunda AI agent, you can tailor it further. For example:
- Add and configure more tools.
- Update the system prompt to adjust the AI agent's behavior.
- Experiment with different model providers and configurations in the AI Agent connector.
Learn more about Camunda agentic orchestration and the AI Agent connector.
Register for the free Camunda 8 - Agentic Orchestration course to learn how to design and integrate AI agents in your end-to-end processes. For more insights and examples, explore our Camunda AI agents blog posts.