Amazon EventBridge Webhook connector
Use the Amazon EventBridge Webhook connector to start a process instance or continue a running one when an event arrives from Amazon EventBridge.
About this connector
The Amazon EventBridge Webhook connector is an inbound connector that exposes a webhook URL. Amazon EventBridge sends events to this URL through an API destination, and the connector triggers your process. For example, use it to start a process instance when an EventBridge rule detects a new shipment.
You can use the connector with the following BPMN elements:
- Start event
- Message start event
- Intermediate catch event
- Boundary event
- Receive task
To send events to Amazon EventBridge from a process, use the Amazon EventBridge connector.
Prerequisites
To use the Amazon EventBridge Webhook connector, you need an Amazon EventBridge setup that can send events to the webhook URL of the connector. See configuring Amazon EventBridge for an example.
Create an Amazon EventBridge Webhook connector task
You can apply a connector to a task or event via the append menu. For example:
- From the canvas: Select an element and click the Change element icon to change an existing element, or use the append feature to add a new element to the diagram.
- From the properties panel: Navigate to the Template section and click Select.
- From the side palette: Click the Create element icon.
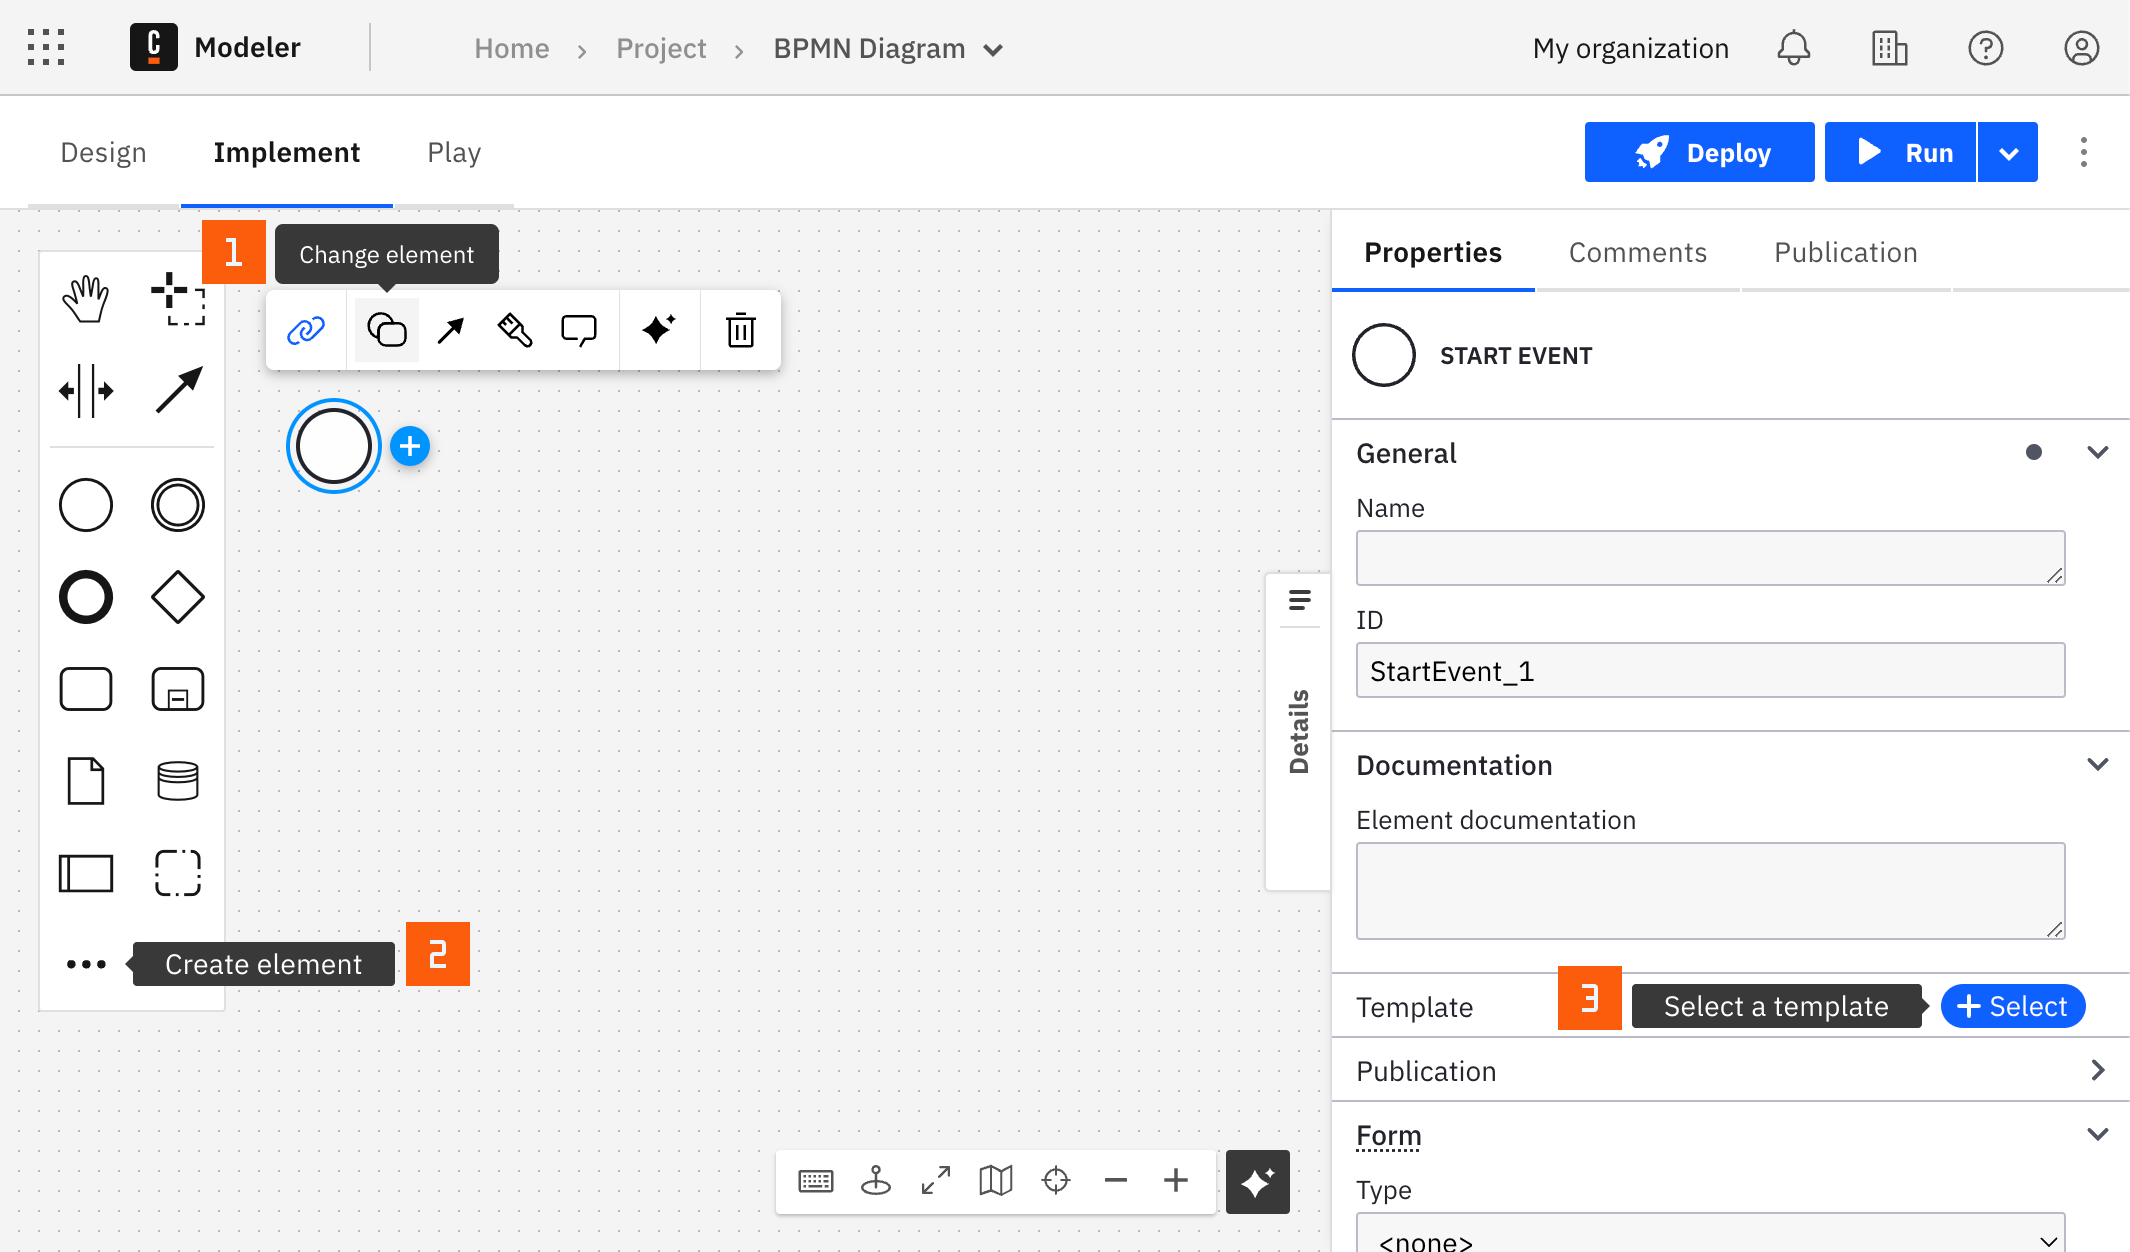
After you have applied a connector to your element, follow the configuration steps or see using connectors to learn more.
For the modeling steps of each BPMN element, see using inbound connectors.
Configuration
Properties differ by BPMN element. Unless noted otherwise, a property is available for all elements.
Webhook configuration
| Property | Type | Required | Description | Example |
|---|---|---|---|---|
| Webhook method | Dropdown | Yes | The HTTP method of the webhook: Any, Get, Post, Put, or Delete. Select Any if the method doesn't matter. The default is Any. | |
| Webhook ID | String | Yes | The ID (path) of the webhook. It's part of the webhook URL. By default, it's pre-filled with a random value. See activating the connector. |
Authorization
| Property | Type | Required | Description | Example |
|---|---|---|---|---|
| Authorization type | Dropdown | Yes | The authorization type: None, JWT, Basic, or API key. The default is None. |
Select the authorization type based on your security requirements and fill in the corresponding properties.
None
No authentication is required. Anyone can trigger the webhook without credentials.
JWT
| Property | Type | Required | Description | Example |
|---|---|---|---|---|
| JWK URL | String | No | The well-known URL of the JSON Web Key (JWK) Set that contains the public keys used to verify the JWT signature. Learn more about JWK. | |
| Issuer | String | Yes | The expected value of the JWT iss claim. | |
| Audience | String | Yes | The expected value of the JWT aud claim. | |
| JWT role property expression | String | No | An expression to extract the roles from the JWT. The roles are checked against Required roles. | =if admin = true then ["admin"] else roles |
| Required roles | String | No | A list of roles to test the JWT roles against. If provided, the webhook is triggered only if the JWT contains at least one of the required roles. | ["admin"] |
Basic
| Property | Type | Required | Description | Example |
|---|---|---|---|---|
| Username | String | Yes | The username to authenticate the webhook. | |
| Password | String | Yes | The password for the username. |
API key
| Property | Type | Required | Description | Example |
|---|---|---|---|---|
| API key | String | Yes | The API key that must be provided in the request to authenticate the webhook. | |
| API key locator | String | Yes | A FEEL expression that extracts the API key from the request. It's evaluated in the connector runtime. The default is =request.headers.apikey. | =split(request.headers.authorization, " ")[2] or request.headers.mycustomapikey |
Activation
| Property | Type | Required | Description | Example |
|---|---|---|---|---|
| Condition | String | No | The condition under which the connector triggers, evaluated against the incoming event. Leave empty to catch all events. Learn more about the activation condition. | =(get value(request.body, "detail-type")="MyEvent" and request.body.detail.status="received") |
For example, given an incoming Amazon EventBridge event with the following body:
{
  "version": "0",
  "id": "6d3d35b7-5bf2-43ec-9e55-5cfb27ad31b4",
  "detail-type": "MyEvent",
  "source": "custom.application",
  "account": "123456789012",
  "time": "2023-07-25T12:34:56Z",
  "region": "us-west-2",
  "resources": [],
  "detail": {
    "shipment": "123456789",
    "status": "received"
  }
}
the example condition triggers the connector only when the detail-type is MyEvent and the status is received.
| Property | Type | Required | Description | Example |
|---|---|---|---|---|
| Message ID expression | String | No | An expression to extract the unique identifier of a message from the incoming event. Not available for the start event. Learn more about the message ID expression. | = request.body.detail.transactionId |
Correlation
Correlation applies to the message start event, intermediate catch event, boundary event, and receive task. It isn't available for the start event. Learn more about correlation.
| Property | Type | Required | Description | Example |
|---|---|---|---|---|
| Correlation required | Dropdown | Yes (message start event only) | Indicates whether correlation is required: Correlation not required or Correlation required. Needed for event-based subprocess message start events. The default is Correlation not required. | |
| Correlation key (process) | String | Yes, for all elements except the start event; for the message start event, if correlation is required | A FEEL expression that sets up the correlation key from process variables. Corresponds to the Correlation key property of a regular message catch event. | =myCorrelationKey |
| Correlation key (payload) | String | Yes, for all elements except the start event; for the message start event, if correlation is required | A FEEL expression that extracts the correlation key from the incoming event payload. It's evaluated in the connector runtime. | =request.body.detail.shipment |
For example, to correlate by the shipment property in the detail of the event above, set Correlation key (process) to =myCorrelationKey, where myCorrelationKey is a process variable, and Correlation key (payload) to =request.body.detail.shipment.
Output mapping
| Property | Type | Required | Description | Example |
|---|---|---|---|---|
| Result variable | String | No | The name of the variable that stores the result of the connector, for example myEventPayload. | |
| Result expression | String | No | A FEEL expression that maps the inbound payload to process variables. |
Learn more about response mapping.
For example, given an event payload with detail containing customer_id and order_total, the following Result expression extracts them as the process variables customerId and orderTotal:
= {
  customerId: request.body.detail.customer_id,
  orderTotal: request.body.detail.order_total
}
Activate the connector by deploying your diagram
After you deploy the diagram, the webhook is active and ready to receive events. The webhook URL follows this pattern:
http(s)://<base URL>/webhooks/<webhook ID>
<base URL>is the URL of the connectors component deployment. In Camunda 8 SaaS, it typically contains your region Id and cluster Id, found in your client credentials under the API tab within your cluster.<webhook ID>is the Webhook ID you configured.
If you change the connector configuration, redeploy the diagram for the changes to take effect.
When you select the element, a Webhooks tab appears in the properties panel. It shows the webhook URL for every cluster where you deployed the diagram.
The Webhooks tab is only supported in Web Modeler as part of the Camunda 8 SaaS offering. You can still use the connector in Desktop Modeler or with Camunda 8 Self-Managed, but webhook URLs are not displayed in Modeler.
Example of configuring Amazon EventBridge
To send events from Amazon EventBridge to the webhook, follow these steps:
- Go to the AWS Management Console.
- Set the required permissions for EventBridge at EventBridge permissions.
- Open Amazon EventBridge.
- Select Integration > API Destination.
- Switch to the Connection tab.
- Create a new connection with the required authorization type (basic, API key, OAuth).
- Create a new API destination with the following information:
- Select the previously created connection.
- Choose the appropriate HTTP method.
- Specify the API destination endpoint, which is the webhook URL generated after you deploy the BPMN diagram.
- Create a new event bus by following the Amazon EventBridge documentation.
- Create a rule that uses the API destination you created. See the Amazon EventBridge documentation for guidance.
Troubleshooting
Learn more about handling errors and failing jobs in using connectors and about inbound connector behavior in using inbound connectors.